Thanks for visiting my blog! Check the right hand sidebar for "Labels" that break the posts into specific topics that you are interested in.

If you have any topics you'd like to know more about, please leave a comment or email me at ventanawardprovidentliving@gmail.com.


Showing posts with label Emergency Preparedness. Show all posts

Wednesday, April 10, 2013

Emergency Preparedness for Babies...

I think that in an EMERGENCY, taking care of our children should be High On Our List.
Can you imagine NOT having any Formula, Bottles, or Diapers?


Here's a List of the Basics
You Should Have On Hand:
Formula
Diapers
Wet Wipes
Diaper Rash Ointment
Bottles
Binky's
Blankets
and
A Few Extra Outfits
You Might Also Think of Including:
Medicine for Fever Relief
Pedialite
Ear Drops
A Bulb Syringe
and
A Few Toys
Keep these items in an extra diaper bag or duffel bag.
So . . . What do you do if you CAN'T get Formula?

 
Here's a Recipe for
Emergency Baby Formula:
Ingredients:
1/3 cup plus 2 Tbsp. Instant Powdered Milk
OR
1/4 cup Non Instant Powdered Milk
1 1/2 cup Boiled Water
1 Tbsp. Oil
2 tsp. Sugar
Instructions:
Mix Powdered milk and water together.
Blend thoroughly.
Add oil and sugar.
If baby bottles are not available,
milk can be spoon fed to an infant.
 (Print this out and keep it with your emergency supplies!)


Here's another recipe I found that I'm definitely interested in trying!

Teething Sticks:
Ingredients:
2/3 cup Milk
1 Tbsp. Brown Sugar
1 cup Whole-Wheat Flour (approximately)
4 Tbsp. Butter, Melted and Cooled
1 cup Untoasted Wheat Germ
Instructions:
Beat together the milk, butter, and sugar.
Stir in the wheat germ and enough flour to make a dough.
Knead until smooth and satiny, about 8-10 minutes.
Pinch off balls of dough and roll them into sticks
about 1/2-inch thick and 4-inches long.
Bake on a greased cookie sheet at 350 degrees
for 45 minutes or until browned and hard.
Cool the sticks before giving them to your baby to teethe on.
ALWAYS supervise any child with a teething stick.

Saturday, March 9, 2013

Food Storage Solutions: Part 2

Here are some ideas for storing water:

A woman in my ward shared these pictures of their barrels stored on the side yard of their house.  The barrels should not be stored directly on concrete because of contamination, so they have placed their barrels on top of 2x4s.  The barrels are also covered from protection from the sun and elements.


Storing water in mylar bags, placed in boxes is a more portable and stackable way to store water.  Click here   to see the box options that can be purchased from Emergency Essentials.  They have a pour spout for convenience.  Each box holds 5 gallons of water, and the basic kit comes with 5 boxes for $29.99 per kit.

The Water BOB is also a cool thing to have in your emergency supplies.  Click here  to see more about it.

 Bottled water is cheap, convenient to transport, and easy to rotate.  Store a couple cases in every closet in the house, or wherever you can find room.  Every time we go to Costco, we buy one extra case of water for a few dollars. 


Food Storage Inventory Tactics


Establish a method
Plan how you will organize and set up your food storage
Make sure your family knows the rules of how the inventory is set up.
Establish a menu
Create a monthly menu of meals that utilize your food storage in a balanced manner.
Food Rotation
Keep oldest food at the front so it gets used first. 
Put a date on everything you put into your storage.  If no expiration date, then put the purchase date.
Store like items together when possible


For our inventory, Brad and I created a simple Excel spreadsheet with a tab for each different category of food.  This lets us know exactly what we have, when it was purchased, and when it will expire.  It would also be helpful to add a column that says exactly where that item is stored in your house (since most of us don't just have one area in the home for our food).  The blog is not allowing me to upload a picture or file of our spreadsheet, but I'm happy to share it!  So if you're interested, email me at ventanawardprovidentliving@gmail.com and I will send you a blank file.

There is also this website trackmyfoodstorage.com that I haven't tried, but it may be a great tool for you!


10 tips for emergency preparedness on a budget
  1. plan for specific disasters
  2. create a personalized list
  3. budget for preparedness items
  4. save by shopping sales
  5. store water in safe containers
  6. request prep items as gifts
  7. think ahead
  8. review insurance policies
  9. update contact records
  10. trade a night out for prepping
      
10 Rookie Food Storage Mistakes
  1. having buckets full of grains, beans or wheat, but have never cooked them before
  2. storing food that your family doesn't eat
  3. not rotating food storage
  4. minimal variety of food for a balanced diet
  5. poor choice of storage containers
  6. never put all your eggs in one basket
  7. forgetting salt, cooking oil, shortening, baking powder, baking soda, yeast, and powdered eggs
  8. not storing water to cook the food
  9. forgetting to store spices, salt, oil and basic condiments that are needed for your food storage
  10. not having an alternative cooking source if the power goes out    

Getting started on your 3 month supply
  1. choose 7-9 of your family's favorite recipes
  2. choose ONE recipe at a time and purchase the ingredients for three months worth of that meal
  3. store the items for each meal together if possible
Here's a great example of how this woman stores her meals.  Each box contains ALL the ingredients for an entire meal.  


Tuesday, March 5, 2013

Emergency Preparedness FHE Lesson

Need an idea for FHE this coming Monday night? Click here for a complete lesson on Emergency Preparedness!

Monday, March 4, 2013

10 iPhone Apps for Emergency Preparedness


While the ability to contact someone in the event of an emergency has always been part of a cell phone’s appeal, today’s technological advances have allowed mobile devices to evolve far beyond simply making and receiving phone calls. With the power of the iPhone backed by the talents of the many developers whose products fill the App Store, you now have unprecedented access to emergency assistance, information and alerts through your cell phone. These 10 apps are among the best for ensuring that you’re prepared for any emergency, and are wise investments to make.
  1. Pocket First Aid & CPR from the American Heart Association – If you live or work with children, there’s a chance that you will one day be faced with the need to intervene due to a choking incident. With this $1.99 American Heart Association-approved app, you can access accurate life-saving information about how to best proceed in the event of choking, drowning or a cardiac episode.
  2. Emergency Survival Handbook – The free version of the Emergency Survival Handbook for iPhone is packed with important information on a variety of subjects ranging from earthquakes to hazardous household chemical exposure. From general preparedness for smaller, everyday urgent situations to catastrophic events, this app touches on everything and will leave you better equipped to face any situation.
  3. Intellicast HD – As one of the most advanced weather applications in the App Store, the free Intellicast HD app offers a variety of tools for staying apprised of weather-related risks and knowing when a severe storm is approaching “natural disaster” status. Push alert notifications will also give you real-time warnings from the National Weather Service, so you’ll never be caught unaware by an escalating storm.
  4. ICE (In Case of Emergency) Keeping your emergency contact and medical information at the tips of your fingers is simple with this free app, which will allow you to store one emergency contact and your driver’s license with the lite version. Higher functionality and more features accompany a purchase of the full, paid version.
  5. American Red Cross: Shelter View – Should a natural disaster or catastrophic event leave you and your family in need of emergency shelter, this free app will let you know when new shelters are opened and where they’re located in order to facilitate the quickest possible move to safety. Offered by the Red Cross and functional across the United States, this is one free app you’ll definitely wish you had should you find yourself in need of shelter and assistance.
  6. iMPrepared – Within the free download of iMPrepared, you’ll get a flashlight, compass, S.O.S signal and access to disaster RSS feeds. Recording relevant contact numbers and medical information will also help you to create a full family preparedness plan in advance, so that you never find yourself in need of such information when every moment counts.
  7. POM Alert – POM stands for “peace of mind,” which is something that this $0.99 app offers in spades. Location-based alerts and real-time notifications keep you informed of any essential public alerts that are issued, including severe weather, disease control and Homeland Security information.
  8. ubAlert – Disaster Alert Network – When disaster strikes, getting relevant information can be difficult. This free app allows you to connect with others in your area and around the world to access reports and event details, ensuring that you’re able to determine the best way to proceed and supplementing the existing emergency alert and information systems.
  9. ELERTS – Whether the emergency in your area is a natural disaster or the result of human action, the free ELERTS app will keep you up to date so that you don’t inadvertently wander into dangerous territory. People on the streets in your area can take pictures to warn others around them of an emergency event, potentially saving lives in the process.
  10. FEMA – The official iPhone app of the Federal Emergency Management Agency, FEMA is free of charge and contains preparedness information for various potential situations, emergency kits, safety tips and an interactive checklist. After a major emergency, you can also access maps with the locations of FMA Disaster Recovery Centers around you.
Your iPhone may be one of the most powerful devices on the market, but it’s still dependent upon a battery for functionality. It’s wise to invest in portable solar chargers, extra batteries and other power supply alternatives to keep your phone charged and ready to use in the event of power failures and extended outages.

http://apartmentprepper.com/?p=8069

Wednesday, February 20, 2013

5 Principles of Preparedness

By Phil Burns - Mon Feb 27, 4:24 pm

The Five Principles of Preparedness

The Five Principles of Preparedness 
There are basic principles that keep us and our families grounded that are key to our happiness as a family unit while we Walk the Path of the Prepper.  There is safety and peace that comes from having car insurance, home insurance, medical insurance,etc.  What many families frequently ignore is “Standard of Living Insurance”.  At its heart, this is what Preparedness, Self Reliance, Prepping – however you want to call it – is.  By Getting Started in Prepping, or continuing in Prepping as the case may be, and following these five Principles of Preparedness we can provide our families with the assurance that we will be able to maintain a certain standard of living.  This standard of living is dictated by the level of preparedness we are able to achieve and maintain.

For example, if a family falls into crisis and they have no preparations then once the average two weeks of supplies they have on hand has been used up, they will drop to a poverty standard of living.  If that same family had a month’s worth of supplies stored up, they would have a buffer of a little more than a month before they suffered consequences of their situation.  Likewise, if they had a year’s supply of essentials stored, they would effectively be giving themselves a year to be able to recover and plan in the event of a paradigm changing event.

Standard of Living Insurance, or Prepping, provides us with a hedge against calamity.  There is much talk recently of “Doomsday” events – which are inappropriately and improperly titled.  After all, Doomsday literally means the last day before the end of the earth.  What point is there in preparing for that?  Massive, widespread crisis, such as; an EMP, Nuclear War, Coronal Mass Ejection, Economic Collapse, and so on is a frequent topic as well.  While these things are important to consider in preparing, it is a mistake to hyper-focus on them.  There are many other immediate, closer and more likely scenarios that make sense to focus on such as the loss or major injury of a breadwinner, loss of a primary job, extended sickness, accidents and other personal calamities.  These happen every single day and each of us likely know someone to whom this has happened.  These are the things that are most essential to develop a “Standard of Living Insurance” against.

The most common effect of living an abundant life, as many of us do, is complacency.  As we progress and develop disposable income the complacent tendency is to adjust our standard of living upwards by purchasing a bigger house, a new vehicle, a boat or other recreational toys instead of investing that money to insure the standard of living that we previously grew accustomed to.  It is most prudent to instead, in times of largess, not expand your standard of living right away but to choose to ensure that if the current boon withdraws the family is not affected by it.  Complacency however, leads us down the path of seeing increased income to the home as play, expendable, or rewarding money – all of which it can be with the proper perspective.  That perspective is to view this blessing as an opportunity to ‘play’ at increasing our stores as much as possible, to purchase as many ‘expendable’ goods as possible – that can go into storage, or to ‘reward’ ourselves by adding a more expensive item to our storage that will significantly increase the amount of coverage our Standard of Living Insurance provides us.  It also gives us the opportunity to scrutinize our funds and storage to determine if the family can splurge a little and enjoy some recreational time without it impacting the bottom line of our Standard of Living – but adamantly without changing our cost of living.

Following the Principles of Preparedness allows heads of households to reduce stress, find peace and be comfortable in an ever-changing and tumultuous world.

Practice thrift and frugality

Principle 1

The depression era saying of “Use it up, Wear it out, Make it do, or Do without” sums up the practice of Thrift.  Living thriftily is not a popular concept in our “Staying up with the Jones’s” mentality, but the folly of that mentality is that if one thing goes wrong and your family slips into crisis, you will have to learn all about “Staying above water”.  Living thriftily is a very simple, effective and immediate method to increase your spending power.  Imagine being, instead of a consumer; a creator, a repairer, or simply abstaining.  It is phenomenally financially wasteful to eat at restaurants on a regular basis, in addition to being typically un-healthy, it also takes away from time spent together as a family creating a personal dining experience at home, together.  Thrift is a practice of not wasting anything including time and money.

Frugality dictates that we live within our means and “Waste not, want not”.  It requires us to be prudent with how we spend our money and to cautiously and guardedly decide how to distribute it.  Why do Americans work themselves so hard and as soon as the paycheck comes in, they throw it to the wind as quickly as they can – leaving them with no reserves, no safety and no peace?  It is because we have come to accept abundance as our standard.  We foolishly assure ourselves that there will be a check next pay period – which there normally is, until there is not.  It is the high possibility that at some point something critical will happen in our lives that brings us to the conclusion that it is very likely that at some point, that check will not be there.

One massive waste that Americans have become very comfortable with is living on credit.  We have become extremely complacent with our finances in this regard.  Instead of doing without for a short time while we save, we finance everything and as a consequence, pay financing fees and interest that we somehow justify as necessary.  It is not necessary that we ever pay financing fees or interest for anything, even a house, if we are willing to be prudent.  Instant gratification is the bane of thrift and frugality.  We Americans have deceived ourselves into believing that we ‘deserve’ to live a better lifestyle than our parents (which took them a lifetime to achieve) – when in reality – we DESERVE to be secure and at peace in our lifestyle.  It is ironic that as a society, we will dicker over $3,000 on a new vehicle and then finance it for 5 years – wherein we condemn ourselves to paying several times that in financing fees and interest.

What good have we done ourselves by shaving $3,000 of off $30,000 when we just finance it?  If you’re willing to pay astronomical fees for the pleasure of immediate gratification, amortizing $3,000 does NOTHING to our monthly bill.  A frugal person would take 3 years and save monthly as much as they would have paid out on their car payment with a little bonus savings here and there over time.  In that short period of time they would accumulate enough cash that they could go into the car dealership and lay down a pile of $23,000 in cash and say they want to walk out with either their money or that $30,000 car.  They’re going to walk out with the car because the dealer wants the instant gratification of the cash versus selling an amortized note at a discount.

Living a thrifty and frugal lifestyle is truly simple.  Use it up.  Wear it out.  Make it Do.  Do Without.  Waste Not.  These things lead us to not being left wanting when a crisis strikes our family.  These two highly empowering tools not only give us the ability to build up our Standard of Living Insurance, they also bring an assured peace and allow us to live a truly abundant lifestyle where we are in control of our money instead being a slave to lenders.

A Prepper who successfully follows this principle for a few years will find themselves in a position where they are able to spend time not working without it affecting the family in an adverse manner.

Seek to be Independent

Principle Two

Debt can be crippling and crushing to a family, making them unable to move forward due to the demands of making payments on things they potentially don’t even own anymore.  Seek to become Independent from debt!  Learn to abhor the idea of being forced to labor and earn money that is not yours as a consequence of choosing to “live a little better” by going into debt.  Living independently means being free to choose what is pertinent for you and your family to do with your money.

As you avoid going into debt and gain greater control of your money, establish savings that will grow and serve you as you become the master of your money.  Learn to budget and responsibly manage your money as it is a very powerful tool to either enslave or empower you.  You can begin to build wealth while you’re getting out of debt by putting together a wise plan like the ones Dave Ramsey teaches in his Financial Peace University.

Independence doesn’t just mean money though.  Seek to be Independent of the influences of the world such as; caffeine, alcohol, drugs, tobacco, un-healthy yet addictive food, medications (where possible) and so on. All of these things not only make you a personal slave to addictions, it also indentures your wallet to spending wasteful amounts of money to satiate your personal weaknesses.  Strive to become Independent of all these things and you will not only find a healthier you, you will also increase your income as you free a daily outgo to servicing your demons.

Live Independent of the entrapping influences of society as much as possible.  Free your mind of thinking you need a better looking car, a prettier house or better clothes.  Do what works for YOU, not what you think others will think highly of.  Live independent of the fear of judgement of others and become secure in your own person.  There seems to be a farcical belief in our society that we should appear as wealthy as possible.  The idiocy of this belief is that it fails to take into account just how damaging it is to our self-esteem, our lives and our livelihood.  Break free of these childish societal ‘norms’ and live a life independent of the influence of advertisers, marketers and peer pressure!

Prepper families who learn to live independently will find themselves prospering greatly – in ways that may not be apparent to the enslaved masses of society.

Become Industrious

Principle Three

Learn, Explore, Do.  Manage your circumstance to your advantage, be enterprising and fully explore opportunities that come your way.  Seek always to discover ways to create benefit to you and your family.  When opportunity presents itself, work hard at redefining and reshaping yourself, your position and your knowledge to be worthy of the success that opportunity can provide.  Be resourceful, always looking for a new way to create what you need in order to succeed.

Common ways to be industrious include furthering your education – your whole life – and constantly working to develop new skills.  By exploring opportunities, we are able to assess their potential, weigh risk and make a decision as to whether our conclusions merit committing to an opportunity or walking away from it.  By improving ourselves constantly, we open up even more opportunity that can potentially bring success.
Idly standing by and waiting for success to land in your lap is a poor strategy.  Being industrious means getting up and attempting something – even if it has the potential to fail.  The Farmer who fails to put in a crop because he doesn’t think there was enough snowfall during the winter loses out when spring rains finally bring plenty of water.  When you commit to something, work hard at it, throw in everything you’ve got.
Getting up and going is truly the only way to end up somewhere else.

Preppers who industriously seek out opportunity will soon find the one that will create a change in the direction their lives have been heading.

Strive Towards Self Reliance

Principle Four

The Principle of Self reliance is predicated by, and builds upon the first three principles.  They are unavoidably intertwined and interdependent.  Self Reliance is, in its simplest form, being able to create or provide all needed things  as the result of labor using a developed skill or talent and being able to provide resources as a result of a judicious practice of storing needful things.  Therefore, becoming Self Reliant is the actual process of developing skills and talents while putting away resources.

When combined with Thrift and Frugality, Self Reliance is providing needed things for yourself that you would otherwise have had to pay money for such as; growing a garden, sewing or repairing clothes, building furniture, building a home, fixing your vehicle and so on.  It is being willing to enjoy the fruits of your labor versus the blandness of buying something commercially produced.  It is accepting things for their functionality, not for the logo that was stamped on them in a plant somewhere.  It is being willing to use something that may be less than perfect in its manufacture but is pure in intent and purpose, knowing that the next one you create you will be able to work out flaws and produce something better.

Self Reliance, when combined with Independence, drives us to be truly reliant on ourselves in all areas.  It teaches us to discover a vocation where we are able to create an expandable income using our talents and labor instead of falling into a career where our income is constricted by salaries and our progress in hindered by being boxed into a job description.  A truly independent person creates income opportunities for themselves and others while staying free and clear of debt and interest.  A Self Reliant person builds their own storage and is not dependent on a grocery store to be stocked and operational for them to feed themselves and their family.

Your Industriousness should not be just financially motivated.  Self Reliance is the act of being free of needing others, including companies, the government, or your community to provide for or support you.  It is learning how to; make soap, grow your own food, provide your own energy, defend yourself, create the things you need and so on.  It requires research, learning, experimenting, failing, experimenting more and finally succeeding – in gaining a new skill, accomplishing something new or developing a new vocation.  An industrious and self-reliant person is truly a creator and experiences the joy of creation on a daily basis.

A Prepper who begins to become Self Reliant experiences a mental shift and begins to see things such as a grocery store as a warehouse that is utilized to stock up their own storage.

Aspire to have a year’s supply of every needful thing

Principle Five

The natural outgrowth of becoming truly Self Reliant is to feel compelled to store things up that are essential for our family’s ensured safety, comfort and existence.  Every needful thing teaches us to consider the possibility of storing up a supply of every item that we purchase which we truly need.  What is a need?  Simply put, it is something that it would be difficult or impacting to have to live without.  This includes; food, clothing, water, heat, power, home medical supplies, fire starters, light and so on.

It is obviously not prudent to just purchase a year’s supply of every needful thing.  Instead, it is a goal that is pursued relentlessly by the Self Reliant Person and is adjusted for each item of consideration.  For example, it is quite inexpensive and easy to acquire a years supply of ketchup – at most a family will probably use 2 bottles a month.  Therefore, purchasing 24 bottles would give you a years supply.  However, a year supply of something like water, which is consumed every day, requires a very different approach.  It is not feasible to store a year supply of water unless you have your own water tower.  There are other options available though which include such things as; drilling a well, installing a rain catchment system, being situated near a body of water.  Several of these options would require filtering the water that you acquire.  For the money spent on a filtering system, such as a Berkey filter, it becomes prudent to purchase filtering capability for the system that will last several years.  Each item is adjusted in quantity and time by its own consideration.
One year is not a magic number.  It is, however, a measure which provides us with a lengthy buffer to recover from whatever has happened.  It also allows us to be charitable towards others who have fallen on hard times without it creating a severe impact on us.  Imagine an unprepared neighbor or friend having their bread winner incapacitated for a period of time and not being able to provide for themselves.  You are not impacted by their crisis and because you have a year’s supply stored up, you have the opportunity to assist them by opening your storage to them and allowing them to take what they need without it causing you an economic impact and with very little added risk to yourself.

Begin by striving to build up a 3 month supply, then double it and double it again.  Once you’ve accomplished the first three months, you will have an idea of the amount of time and money it will take to acquire a year’s supply.

The Prepper who is striving to build a year’s supply of every needful thing will experience a dramatic reduction in stress and inverse increase in peace as they begin meeting goals on the path to achieving this principle.

The impact of living The Principles of Preparedness

When teaching these Principles, the question is inevitably asked “What if nothing ever happens that I need my supplies for?”.  To which I respond, “That would be wonderful!”.  Most people don’t get it right away, but let’s consider it.

Consider if you adjusted your life and lived for years under these principles.  What impact would there be if nothing happened that required you to survive off your stores?  Might it be possible that in following these principles you will have created a new life for yourself that is infinitely better than it would be otherwise?  Would you possibly have spent that time living in peace, without stress and with a much higher level of confidence, satisfaction and self-esteem?  I can testify to you that this is indeed what will happen!  In fact, the mere application of these principles in your life will allow you to weather small crises without them even registering a bump in the continuity of your life.  When you are living a Self Reliance lifestyle with a full year’s supply, not having an income for a month is inconsequential.  If you fully commit to living these principles, do you see how this would be the outcome?  Would that serve you to be able to live that way?

Consider also that as you develop a year supply of every needful thing, you are to live off of that supply.  You don’t just package things up and leave them in a corner to gather dust.  You consume your supply each month and at the end of four weeks, go to the “warehouse” (aka grocery store, etc) and replenish your supply with six weeks worth of what was consumed.  This allows you to continuously grow your storage with little to no visible impact to you.  And, if times are tough financially, you can extend to 8 or 12 weeks without it stressing your family.

As you become these Principles, you will experience breaking free of the slavery of debt, a ‘career’, of “keeping up with the Jones’s” and most importantly, the stress of trying to live month to month.  What you will find instead is that you are able to fully experience life and truly enjoy the blessings of your family.
All the while knowing that the secret to a happy life is wrapped up in a little concept called being a “Prepper”!

Article found here from the American Preppers Network.

Tuesday, February 19, 2013

foodstoragemadeeasy.net

foodstoragemadeeasy.net is an amazing website!  You have to check it out if you haven't already.  One of the things I've loved is that I signed up for the weekly emails they send called their "Baby Steps Checklist".  This week the checklist is all about how to plan and purchase your three month food supply.  I highly recommend signing up for these weekly emails because they are all full of really great information!

Here's how to sign up:  foodstoragemadeeasy.net click on "checklists" and then on "free baby steps checklists."  It's awesome!

Tuesday, February 5, 2013

The Top 50 Survival Blogs

 If you want to start reading some of the best blogs about Survival, they have recently been ranked and published on this website:

http://www.survivaltop50.com/

Most of these are probably not written by LDS people, and they cover a lot more subjects than just food storage, but if you want to take a look you are welcome to.

I think it would be a completely different list if they were ranking Food Storage sites.  I personally, would put     http://foodstoragemadeeasy.net/    and     http://www.providentliving.org/channel/0,11677,1706-1,00.html  at the top of that list

Tuesday, January 29, 2013

Buying a Three Month Supply in Bulk

Tax return season often results in a chunck of money for some so what better place to spend it then preparing your family with a three month supply of food storage?

Click here for a great plan to buy your three month supply in bulk. 

Seven Secrets of Dutch Oven Cooking

Dutch ovens may be a great way to cook if for some reason we were unable to use our stoves and ovens.  (This does mean that you'll need some charcoals in your storage supplies too!)

Here is a great website with lots of good information about dutch oven cooking, and some recipes too!

Monday, January 21, 2013

4 Questions to Ask When Prioritizing Emergency Preparedness Goals


image by john.shultz
It’s a new year and that means the traditional time of making new goals for yourself. Hopefully you added a few goals to be better prepared this year.
I keep an ongoing list of things I want to learn, do, and purchase for preparedness.  I call it the “Big List” and keep it in a notebook in my purse.  It keeps me working toward a goal and learning and preparing. But sometimes looking at the “Big List” is daunting.  There is a lot on there!  And it seems like every time I cross something off the list, I add two more things.  How will I ever accomplish it all?  And for sure how will I ever purchase it all on our little income?

This could be a cause of great anxiety and even bring on “preparedness panic shut-down” where you decide that rather than tackle that huge list, you’ll just put your rose colored happy glasses back on and do nothing.  Because really, there’s no way you can get it all done and it’s causing stress just thinking about it.
Know anybody like that?  Yeah, it happens.

So here are 4 questions to ask yourself to make prioritizing your goals easier when your preparedness to-do list seems a bit overwhelming.

1. “Is this item/skill/etc. going to keep me or my family alive if the stuff hits the fan and all heck breaks loose?” Focus on those things that will keep you and your family alive first.  Having a supply of clean water, short term food supply, medical training, and maybe firearms along with the training to use them should be on the list above things like “learn to can my own food”.  Food preservation is absolutely a skill you want to have in your arsenal, however, if you can’t live through the first few days post disaster due to contaminated water, your food preservation skills will do you no good.

2.  “Which items/skills on my list will be of most use to me?” For example, you want an alternative way to cook food if the power is out.  Before jumping in and purchasing a Sun Oven, make sure you get enough days of sunshine without clouds and/or strong winds to make that option more useful than a rocket stove or some other means of off-grid cooking.  Or maybe you have a special situation in your family like a baby, medical condition, or special needs family member that needs to be taken into consideration before making decisions.  Just because something is a good choice for your neighbor, friend, or favorite blog author, doesn’t mean it’s a good choice for you.

3. “What is the most cost effective way?” If you have tons of money, go ahead and spend whatever you want on preparedness.  However, most of us have limited funds and budgets.  As much as I love the Country Living grain mill and because of quality, flexibility, and warranty would recommend it if you have $429 for a grain mill, if you only have $429 total to spend on preparedness and you need a grain mill, you can purchase a less expensive, but still quality built, mill like the Wonder Junior mill, and still have money left for a little water filter, a stove, a CPR class, an inexpensive rifle off your local classifieds, and/or some canned goods from the case lot sale.

4. “Do I need that?” This kind of goes along with number 3, and can help manage your money and time as you work toward being more prepared.  I’ve been wanting a gravity fed water filter like a Big Berkey filter system.  Clean water is extremely important, but the filter is kind of pricey.  It hasn’t made the “Buy Me” cut yet because I have a few smaller water filters (water bottle filters, hiking size pump filter, and LifeStraw), lots of water stored in jugs, and methods to purify water from iodine type tablets to heating water on a stove/fire or in my Sun Oven.  Same with training opportunities.  If you are CPR certified and a CPR class comes available, you could take it again, but do you need to?  Could you use that time to learn something in an area you don’t already have skills in?

Keep an open mind with your prioritizing.  If a pressure canner is on your list after 5 other big ticket items and an opportunity presents itself to buy one at a yard sale for cheap, by all means take that baby home with you!  But in general, asking these few questions will help you figure out where on your list of preparedness goals to begin and hopefully you’ll stay out of the panic shut-down and be on your way to becoming better prepared for whatever may come.
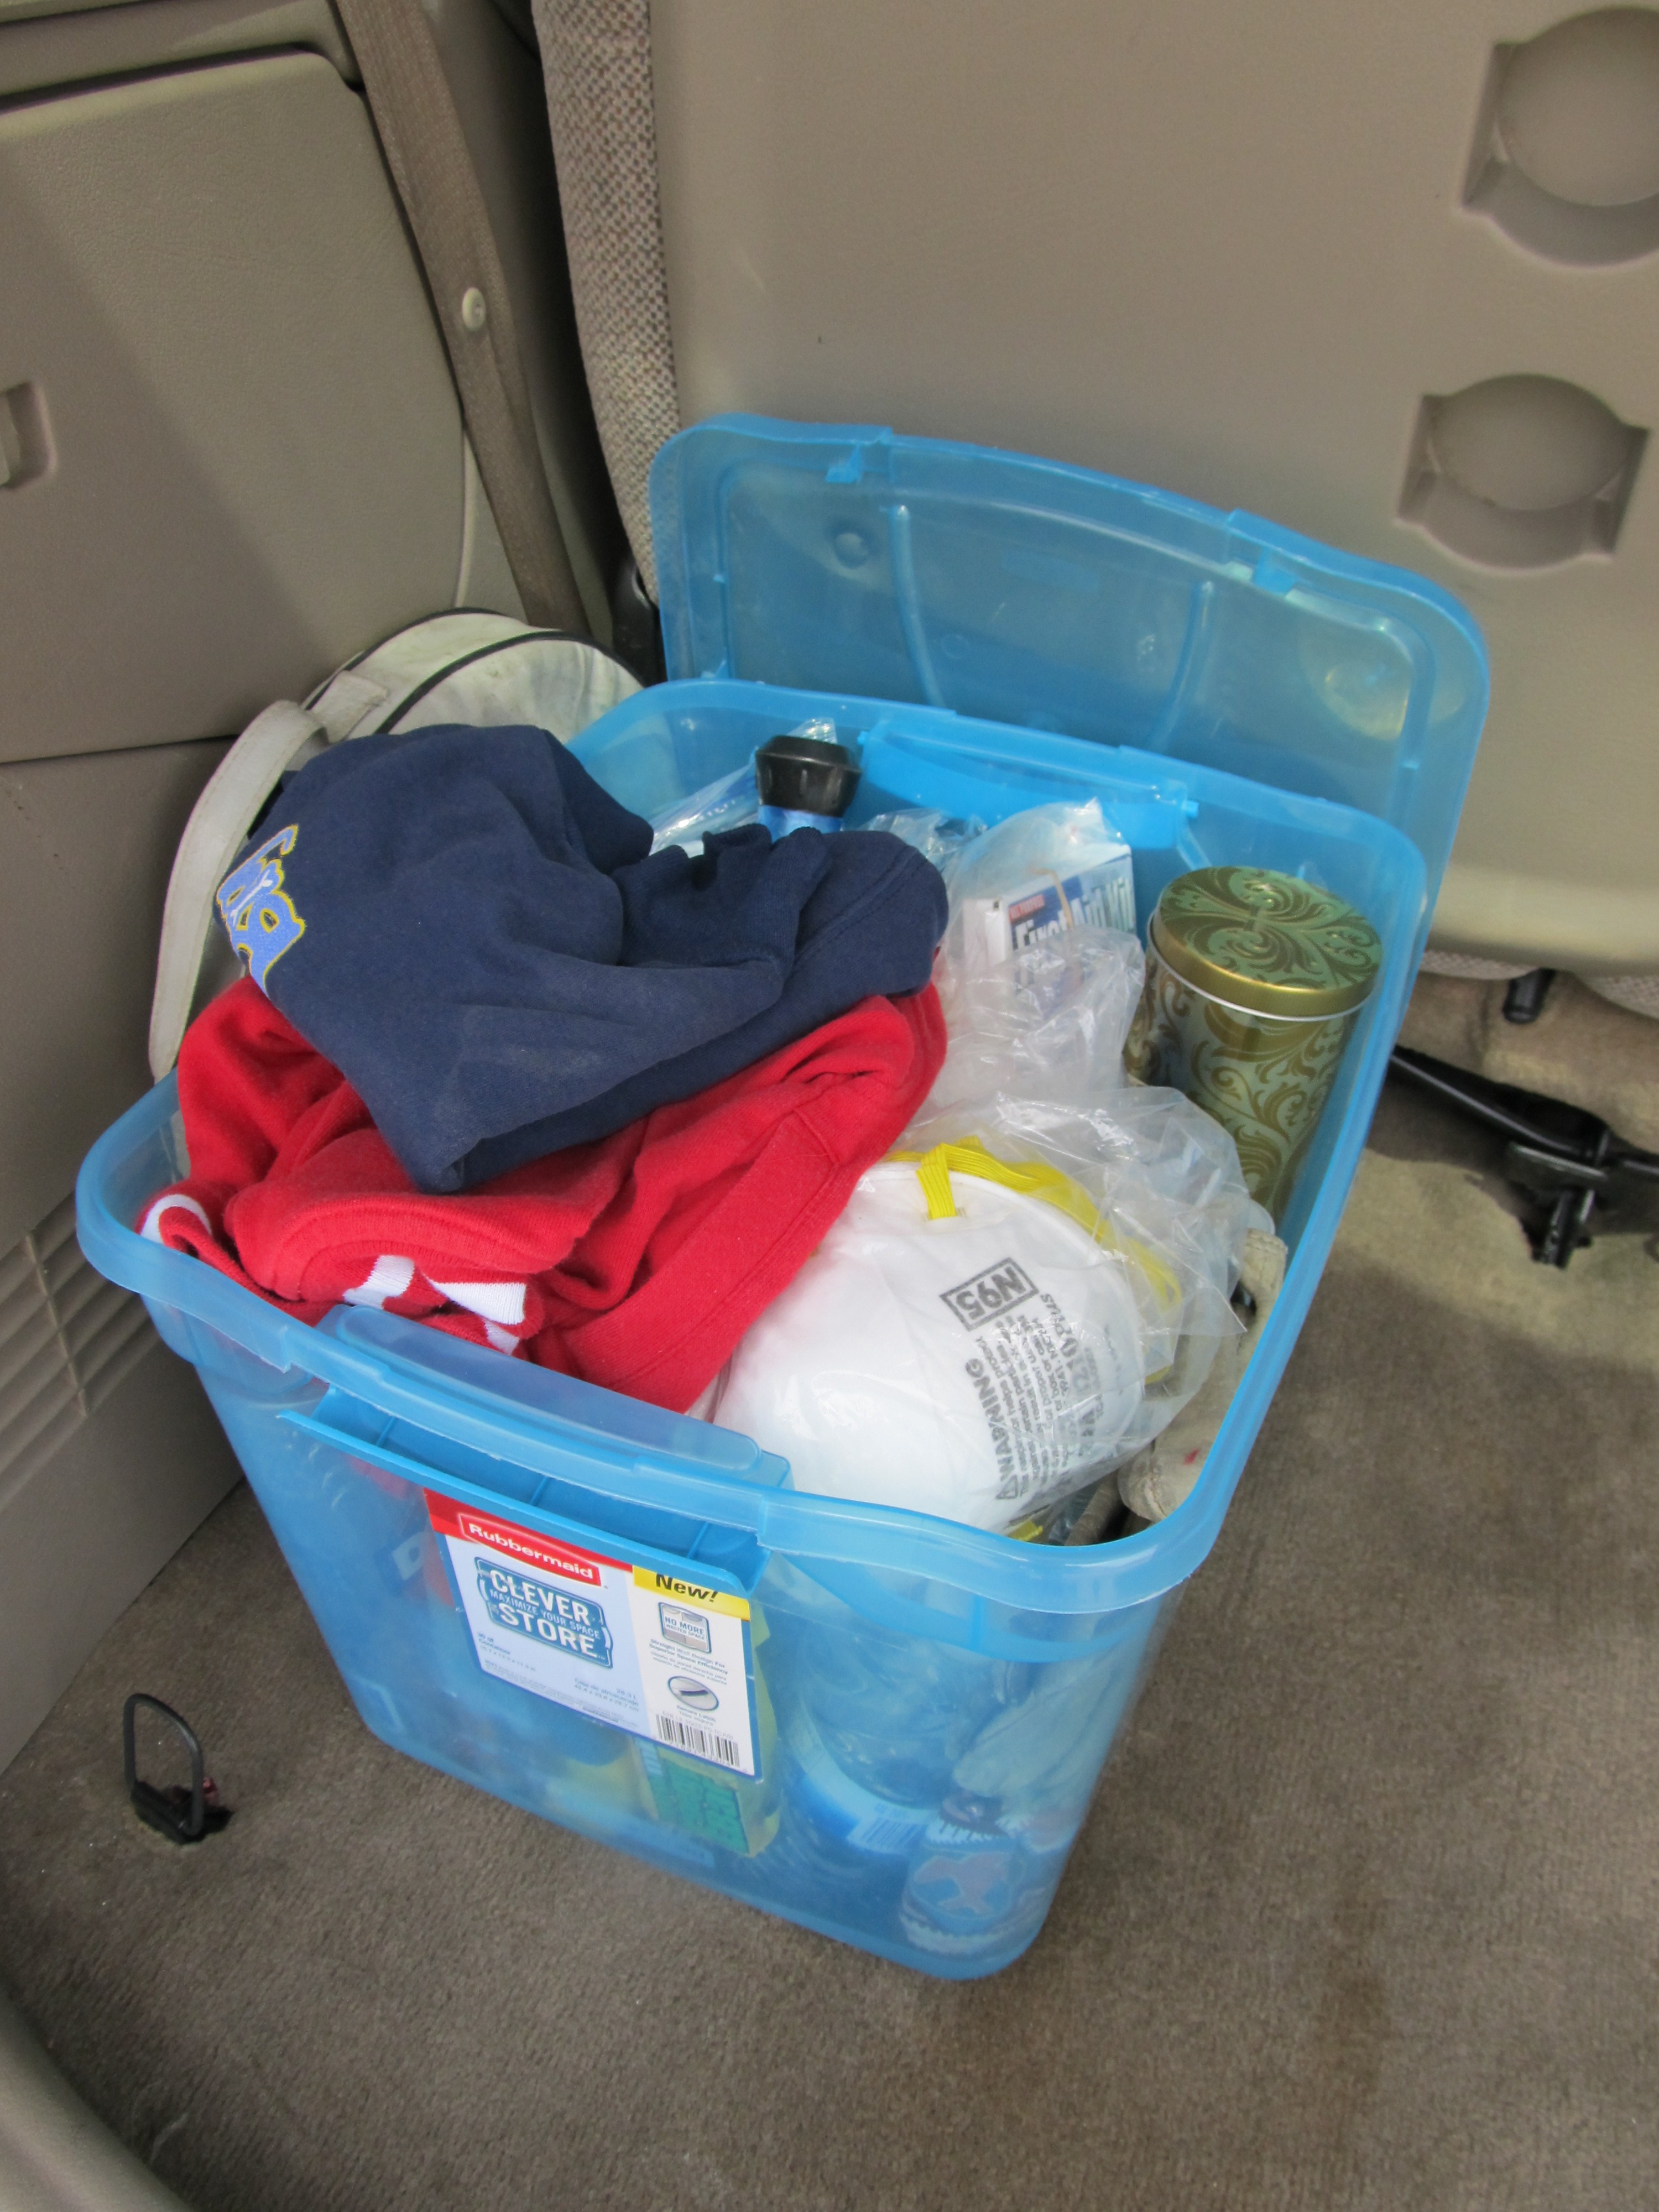
5 Reasons to Update and Rotate your Emergency Kits


Apr 102012

 
Once you get an emergency kit put together either for your home, office, car, or bugging out, there is a tendency to stash that kit somewhere and forget about it.  Don’t do it.  Be friends with your kit.  Check in on it at least once a year–every 6 months is even better.  And some kits need updating even more often than that.  Need some convincing to do a kit checkup?  Here are 5 great reasons to keep updating your emergency kits.

1. You use stuff out of it.  Well, maybe it wasn’t you, maybe it was your significant other or your kids or the ubiquitous “nobody”.  The point is, sometimes when you most need a roll of toilet paper from the car kit it isn’t there!  If you keep a list of items that are supposed to be in the kit tucked in the kit somewhere, it’s easy to check if everything is there.  If you know you’re using items frequently, you will probably need to refill your kit more often than every 6 months.

2. Food and water expire.  Some of the foods in your kit will have an expiration date.  If you’re checking in on your kit often, you can eat these foods and replace them with fresh items.  Same with water bottles.  They aren’t made to last forever–the water gets an “off” taste and it is reported that some of the plastic chemicals leach into the water after long periods of storage.  Use them and replace them before they are too long past their expiration date.  If you have really old water bottles, use that water to water your plants or something.

3. Medications expire.  If you have medications in your kit, these also need rotated.  At best they begin to lose potency after their expiration date.  I want medicines that are going to work and work well when I need them, so I try to keep the medicines updated with fresh stuff from the medicine cabinet.  Check this post to see how I keep track of the lots and expiration dates of the medications in my kit.

4. People grow.  Especially kids.  If you have extra clothes or shoes in your kits for your family members, how likely are they to actually fit them in an emergency?  With some kids (especially babies and young teens) this will need changed out every 6 months or so while they’re going through growth spurts.

5. You learn something new.  Maybe you’ve been reading a book or a blog and come across something you really think would be of value to your family in an emergency.  Get it into your kit and add it to your kit master list.

Some folks like to pack their kits and leave them (our evacuation kits are like this), and some use items from their kits for everyday emergencies (our car kits are more like this).  Either way, your kit will need updated and rotated frequently to best serve its purpose when there is a reason to use it.

Thursday, January 17, 2013

Monday, January 14, 2013

Home Water Storage

Emergencies: Home Water Storage and Emergency Disinfection Before an Emergency


Amount of Water to Store

The Department of Environmental Quality, Division of Drinking Water recommends water storage of 1 gallon per person per day for 2 weeks. This is based on 2 quarts or ½ gallon per person per day for drinking water and food pre parathion, and another 2 quarts or ½ gallon per person per day for other limited uses such as hand washing, teeth brushing and dishwashing. (This is a total of 14 gallons per person for 2 weeks.)
A normally active person needs to drink at least 2 quarts (1/2 gallon) of water each day. Hot environments and intense physical activity can double that amount. Children, nursing mothers and people suffering from disease or injury may need more water. Immune compromised people may want to take extra precautions to minimize their risk in an emergency.

Supplies Needed Before an Emergency

  • Food grade containers for storage of water
  • Funnel
  • Filters: coffee filters, clean cheesecloth, teal towel, or pillowcases
  • Eyedropper
  • Unscented chlorine bleach (5.25% sodium hypochlorite)
  • Large clean pan with lid for boiling water
  • If storing water in a 55 gallon drum, a pump is needed
  • Purification device, back packer filters
  • Camping stove to boil water

Storage Containers

Water should be stored in containers manufactured for food use.
  • A 5 gallon heavy duty plastic container with spigot to dispense water (weighs approximately 42 pounds when full).
  • A 6 gallon Mylar water storage bag, impermeable to odor, gas and light, contained in a cardboard box for easy stacking. Durable (weights about 50 pounds).
  • A 2 liter plastic drink container with screw on lid.
  • A 55 gallon drum that has not stored toxic materials (weighs 460 pounds when full).
  • A thermos type container.
  • A 1 gallon size glass jug (padded with newspaper).
  • Water “canned” in regular canning jars and processed for 20 minutes (repack in cardboard box and pad with newspapers).

Never use any containers that have held toxic substances.

Plastic bleach bottles and gallon milk containers are generally manufactured with non-durable plastic that promotes biodegradability and is undesirable for long term water storage. Water stored in non-durable plastic containers may become toxic over time from breakdown products from the plastic container walls.
The disposable, plastic milk bottle is thin-walled and tends to develop leaks easily. Liquid chlorine bleach bottles are made of thicker polyethylene plastic and may be used for water storage if the empty bottles are thoroughly rinsed with hot water and allowed to dry. However, the use of bleach bottles for water storage is not recommended, because of the potential danger of accidentally drinking bleach instead of water. If bleach bottles are used for water storage, remove the bleach label and write “WATER” indelibly across the bottle. Children may mistakenly associate the size and color of bleach bottles with acceptable sources for drinking water and mistakenly drink bleach. As such, bottles must be positively identified, and bleach must be kept out of the reach of children.
If plastic containers are used, care should be taken to assure that they are made of plastic approved for food contact by the Federal Food and Drug Administration (FDA). Polyethylene plastic is approved for food contact and is commonly used for containers of various sizes, including large 55 gallon drums. Certain types of plastic containers are not intended for food contact (such as vinyl plastic waterbeds or trash containers) and may leach undesirable chemicals into stored water. Leaching from approved plastics into water is negligible.

Preparing Water for Storage

Stored water must be clean water. Use the best quality available for water storage. Water must be from a system with a Division of Drinking Water “Approved” rating. Water stored in thoroughly clean plastic or glass containers can be chemically disinfected for long term treating each gallon with 4 to 5 drops of liquid chlorine bleach (Clorox or Purex type bleaches, containing 4% to 6% sodium hypochlorite). One teaspoon of bleach disinfects 5 gallons of water. Allow 20 to 30 minutes before drinking. The level of treatment will prevent growth of microorganisms during storage. Most municipal water storages are already disinfected so no additional treatment is necessary. Fill clean food grade container with tap water and screw on lids.

Storage Conditions

Store water containers away from cleaning supplies, fertilizers and other products with strong odors. These odors could be absorbed by the storage containers and transferred to the water.
Water stored in plastic containers should be filled to the top so there is no air space and should be stored in a cool, dry location away from petroleum and insecticide products, and away from strong odor food or perfumed products.
Vapors from these substances could permeate the plastic and affect the water. Thick walled polyethylene containers are significantly less permeable to vapors than are thin walled containers.

Use of Stored Water

Once the container is opened, use the water rather than restoring it. If stored water has a flat taste, pour it back and forth between two containers several times. Rotate water every 1 to 2 years.
Store as much water as possible, more than the bare minimum (especially in desert and hot climates). Be certain to label each container so there will be no questions about its contents. Include the date and information on the method of disinfection used.

After an Emergency

Emergency Inside Water Sources

  • Water heaters.
  • Soft water tanks.
  • Melted ice cubes.
  • Toilet tank (not bowl) provided no chemical sanitizers are used.
If a disaster catches you without a stored supply of clean water, you can use the water in your house piping system, your hot water heater and even ice cubes. Know the location of your house’s water shut off valve. In a disaster in which your water company’s supply of water to your house has been interrupted (e.g., broken water mains in the streets), shut off water supply into your house to prevent backflow of contaminated water. To use the water in your piping, let air into the plumbing by turning on the faucet in your house at the highest level. A small amount of water will trickle out. Then, leaving the highest faucet on, obtain water from the lowest faucet in the house.
To use water in your hot water heater, first turn off the electricity or gas supply, and then close off the cold water supply line to the water heater. Open the drain at the bottom of the tank and start the water flowing by turning on a hot water faucet somewhere else in the house. Collect the water containers and disinfect each gallon with 4 – 5 drops of liquid bleach. Allow 20 to 30 minutes before drinking. (Note: If the water is cloudy and/or from an unsafe origin, 16 drops of liquid chlorine bleach is recommended.) You can use water in the tank of your toilet (not the bowl). Disinfect as with water from the water heater.
Some water sources may have chemical contamination that makes them unacceptable for drinking. For example, waterbed mattresses usually contain organic chemicals in the wall plastic and biocidal chemicals in the water to prevent algal, fungal and bacterial growth. These various chemicals can make the water unsafe to drink. During an emergency such water may be used for hand washing and laundering.

Emergency Outside Water Sources

  • Rain water.
  • Ponds and rivers.
  • Untested wells and springs.
Some emergencies may warrant obtaining water from sources outside the home. The hazards of using water, including ice and snow, of unknown quality needs to be carefully weighed against the obvious life sustaining need for drinking water. Even crystal clear, mountain stream water can be contaminated with disease causing parasites such as giardia. Sterilization or disinfection can reduce the microbiological hazard of water of unknown quality, but there is no safe method for reducing the chemical hazard (e.g., toxic chemicals and radioactive materials) of water of unknown quality. If water is cloudy, chemical disinfection must be supplemented by some kind of filtration or heat sterilization (20 to 30 minutes of boiling) to assure complete destruction of disease causing organisms. (Note: If water is cloudy and/or from an unsafe origin, 16 drops of chlorine bleach is recommended.)
In addition to having a bad odor and taste, contaminated water can contain microorganisms that cause diseases such as dysentery, typhoid and hepatitis. You should disinfect all water of uncertain purity before using it for drinking, food preparation or hygiene.
There are many ways to disinfect drinking water. None of the listed methods are perfect. The methods described below will kill most microbes, but they will remove very few chemical contaminants. Before water is disinfected, let any suspended particles settle to the bottom of the container, or strain the water through layers of paper towels, filters such as coffee, clean cheese cloth, or clean cloth into a clean container.
Better clarification can be obtained by drawing cloudy water through a “capillary siphon”.
A capillary siphon can be constructed by rolling a small, clean, terry cloth towel into a long roll. Place one end of the roll into a container of cloudy water. Drape the rest of the roll over the edge of the container so that it hangs free from the container’s sidewall. Be sure the free hanging (dry) end of the towel extends below the water level by several inches. Place a clean container below the free hanging end. Soon water from the upper container will wet the whole towel as the capillary action draws water through the towel to the lower container. With cloudiness removed, chemical disinfection can be more effective in destroying disease causing organisms.

Methods of Disinfection

Boiling

Boiling is the safest method of disinfecting water. It is preferred over any method of chemical disinfection because most disease causing microorganisms cannot survive the heat of the sterilizing boil. Water must be heated to boiling and held in a vigorous rolling boil for 5 minutes minimum (preferably 10 to 20 minutes). Let the water cool before drinking. Boiled water will taste better if you put oxygen back into it by pouring the water back and forth between two clean containers. This will also improve the taste of stored water.

Chemical Disinfection

Chemical disinfection of water is an acceptable alternative to heat sterilizing, but only if the water is clear. Disease causing organisms, such as viruses, can “hide” inside the microscopic dirt particles that cause cloudiness in water. They can thereby escape the action of the disinfecting chemical and remain capable of producing disease.
Chemical disinfection is less reliable than disinfection via boiling because of several different factors. For example, the more organic matter there is in the water, the more chemicals are required. The colder the water is, the longer the “contact time” (the length of time between addition of disinfecting chemicals to the water and use of the water) should be. Additional factors affecting the success of disinfection includes the amount and type of chemicals used, water pH (how acidic or basic the water is), and types of disease causing organisms in the water.

Liquid Bleach

You can use household liquid bleach to kill microorganisms. Use only regular household liquid bleach that contains 5.25% sodium hypochlorite. Do not use scented bleaches, color safe bleaches or bleaches with added cleaners. Each gallon of water should be treated with 4 – 5 drops of liquid chlorine bleach or 16 drops of liquid chlorine bleach if the water is cloudy. This is just under ¼ of a teaspoon per gallon. One teaspoon of bleach disinfects 5 gallons of water. Treated water should be thoroughly mixed and allowed to stand for 30 minutes before using. A slight chlorine odor should be detectable in the water. If it is not, repeat the dosage and let it stand another 15 minutes before using. Treated water may have a slight chlorine taste, but this is additional evidence of safety.
Since liquid chlorine bleach loses strength over time, only fresh bleach should be used for water disinfection. For bleach that is 1 to 2 years old, the dosage should be doubled. Bleach older than two years should not be used unless absolutely necessary because of uncertainty as to how much the active ingredients have deteriorated.

Iodine Tables

Iodine tablets have the advantage of being more effective against amoebic dysentery cysts and certain other intestinal parasite cysts than chlorine-based disinfectants such as sodium hypochlorite or Halazone tablets. Sporting good stores commonly carry iodine tables. Be certain iodine tablets are fresh, since they lose effectiveness with age. Fresh tablets have a gray color. They have a shelf life of approximately 3–5 years unopened. The label should show an EPA registration number. Often iodine tablet containers carry labels recommending restrictions on use by pregnant or lactating women. Check the label before purchasing the tablets. Follow instructions on the label, mixing thoroughly and allowing adequate “contact time”. The iodine tablet should impart a light yellow to tan color to the water and a slight odor.

Halazone Tablets

Halazone tablets (4 dichlorosulfamyl benzoic acid) for emergency water disinfection are commonly carried by pharmacies and drug stores. The label should show an EPA registration number. Be certain to note the expiration date since the shelf life is only about 2 years. According to the manufacturer: “It is important that the containers are tightly closed to prevent the absorption of moisture from the air. If decomposition of the tablets should occur, they take on a yellowish appearance, have a strong objectionable odor, and of course, should not be used”.
Chemical disinfection, liquid bleach, iodine tablets, and Halazone tablets will not remove cryptosporidium