Thanks for visiting my blog! Check the right hand sidebar for "Labels" that break the posts into specific topics that you are interested in.

If you have any topics you'd like to know more about, please leave a comment or email me at ventanawardprovidentliving@gmail.com.


Tuesday, January 29, 2013

What the Church's Website Says

Here is what the church's website has to say about a three-month supply of food.

https://www.lds.org/family/family-well-being/emergency-preparedness?lang=eng

Emergency Preparedness and Response

Members of the Church have been counseled for many years to be prepared for adversity. Preparation, both spiritual and temporal, can dispel fear. With the guidance of Church leaders, individual members and families should prepare to be self-reliant in times of personal or widespread emergency.

Family Emergency Planning

Church members are encouraged to prepare a simple emergency plan. Items to consider may include:
  • Three-month supply of food that is part of your normal daily diet.
  • Drinking water.
  • Financial reserves.
  • Longer-term supply of basic food items.
  • Medication and first aid supplies.
  • Clothing and bedding.
  • Important documents.
  • Ways to communicate with family following a disaster.

Buying Enough Food for Three Months

3 month shelf stable food (shelf stable means it doesn't require refridgeration). Everything for every meal for 13 weeks.

“We can begin ever so modestly. We can begin with a one week’s food supply and gradually build it to a month, and then to three months.”
Gordon B. Hinckley, “To Men of the Priesthood,” Liahona and Ensign, Nov. 2002, 58.October 2002

Here's an example of a way to build the three month supply for your family.  Food storage, especially the three month supply should be food that your family likes to eat.  To plan out the three month supply, you need to make a plan for 13 weeks.  First, collect the recipes of some dinners that your family likes.  Write down all the ingredients right down to the teaspoon of salt.  Decide how much you like that particular meal.  If you can eat it weekly, multiply the ingredients by 13.  If you want it every other week, multiply the ingredients by 6 or 7, etc.  Then you know you have all the ingredients to eat dinner for three months.

You can also do the same with breakfast meals, and ingredients for one loaf of bread a day.

Store what you eat. Eat what you store. Rotate, rotate, rotate.

The ladies on FoodStorageMadeEasy.net feel that it is okay to keep meat in the freezer for their 3 month supply. Some don't want to rely on the power grid though so they can their meat.
Canned goods can easily last 1-3 years, no problem.

Boxes can get bugs in them, rotate them quickly.

Here are some examples of meal plans for a three month supply that I found on some other websites.

Taco Soup. We can easily eat it twice a month. Twice a month for 3 months = 6 times. So I bought 6 bags of Fritos at Sam's, and all the cans of beans, corn, and tomato sauce, bought a big jar of Taco Seasoning Powder, and canned some ground beef. Now I have all the ingredients except lettuce, and we could eat it without lettuce if we had to. (If you don't want to can the beef, just keep it in your freezer.)

Spaghetti. Twice a month. Spaghetti noodles, spaghetti sauce, powdered Parmesan cheese, oil. Buy enough for 6 meals.

Canned Soup- I buy it on sale. We have lots and lots of this.

Hamburger Helper, Asian Helper. One can of chicken for 2 boxes. Oil. Powdered milk.

Snacks and desserts, not just main dishes. Cake mix, can of frosting, oil, powdered eggs.

Jellos and puddings- two per week for 3 months. Remember to store ALL the ingredients. Jello just needs water. I store evaporated milk or powdered milk to make the pudding.

Eat cold cereal half the days for 3 months-11 boxes for our family. I have the powdered milk stored just in case, but for now I'll buy the milk at the store.

Buying a Three Month Supply in Bulk

Tax return season often results in a chunck of money for some so what better place to spend it then preparing your family with a three month supply of food storage?

Click here for a great plan to buy your three month supply in bulk. 

Seven Secrets of Dutch Oven Cooking

Dutch ovens may be a great way to cook if for some reason we were unable to use our stoves and ovens.  (This does mean that you'll need some charcoals in your storage supplies too!)

Here is a great website with lots of good information about dutch oven cooking, and some recipes too!

Weekly Grocery Budget

This blog I've linked to below has some great money saving tips for grocery shopping on a budget.  She feeds her family of 4 with just $50 a week!  Her blog is awesome, with grocery lists, meal plans, and recipes.  Check it out!
http://oneincomefamilyliving.blogspot.com/2011_11_01_archive.html

Wednesday, January 23, 2013

This week's challenge

If you're anything like me, you're really disorganized when it comes to recipes!  Most of the recipes I like, I have pinned online, or saved on the computer, or shoved in a cupboard - somewhere!  There are lots of problems with this, but obviously the biggest is that if something crazy went down in the world and I don't have access to technology, I'm in trouble when it comes to preparing meals!  So this week's challenge, for any one else who wants to accept it, is to start the organization project!  Create a hard copy of all your favorite recipes, put them in an organized binder or something, and then make sure you start collecting those ingredients in your food storage.  I have found that it works good for us if I just grab and extra thing or two each time I'm at the store.  If we need spaghetti sauce, I buy two and put one in our "3 month supply."  This helps create a bigger short term supply, without really feeling the pinch of the finances in a short amount of time.

Challenge accepted.  I've got to go start printing and organizing!

55 gallon water barrels

Do you need some more water storage?  Lisa B. let me know that Sportsman's Warehouse has a great deal on the 55 gallon water barrels.  She said they are $60 there, and just now when I checked the price on Costco.com, it was $119.99 (including the pump).  So definitely check out Sportsman's if you need barrels!

Monday, January 21, 2013

4 Questions to Ask When Prioritizing Emergency Preparedness Goals


image by john.shultz
It’s a new year and that means the traditional time of making new goals for yourself. Hopefully you added a few goals to be better prepared this year.
I keep an ongoing list of things I want to learn, do, and purchase for preparedness.  I call it the “Big List” and keep it in a notebook in my purse.  It keeps me working toward a goal and learning and preparing. But sometimes looking at the “Big List” is daunting.  There is a lot on there!  And it seems like every time I cross something off the list, I add two more things.  How will I ever accomplish it all?  And for sure how will I ever purchase it all on our little income?

This could be a cause of great anxiety and even bring on “preparedness panic shut-down” where you decide that rather than tackle that huge list, you’ll just put your rose colored happy glasses back on and do nothing.  Because really, there’s no way you can get it all done and it’s causing stress just thinking about it.
Know anybody like that?  Yeah, it happens.

So here are 4 questions to ask yourself to make prioritizing your goals easier when your preparedness to-do list seems a bit overwhelming.

1. “Is this item/skill/etc. going to keep me or my family alive if the stuff hits the fan and all heck breaks loose?” Focus on those things that will keep you and your family alive first.  Having a supply of clean water, short term food supply, medical training, and maybe firearms along with the training to use them should be on the list above things like “learn to can my own food”.  Food preservation is absolutely a skill you want to have in your arsenal, however, if you can’t live through the first few days post disaster due to contaminated water, your food preservation skills will do you no good.

2.  “Which items/skills on my list will be of most use to me?” For example, you want an alternative way to cook food if the power is out.  Before jumping in and purchasing a Sun Oven, make sure you get enough days of sunshine without clouds and/or strong winds to make that option more useful than a rocket stove or some other means of off-grid cooking.  Or maybe you have a special situation in your family like a baby, medical condition, or special needs family member that needs to be taken into consideration before making decisions.  Just because something is a good choice for your neighbor, friend, or favorite blog author, doesn’t mean it’s a good choice for you.

3. “What is the most cost effective way?” If you have tons of money, go ahead and spend whatever you want on preparedness.  However, most of us have limited funds and budgets.  As much as I love the Country Living grain mill and because of quality, flexibility, and warranty would recommend it if you have $429 for a grain mill, if you only have $429 total to spend on preparedness and you need a grain mill, you can purchase a less expensive, but still quality built, mill like the Wonder Junior mill, and still have money left for a little water filter, a stove, a CPR class, an inexpensive rifle off your local classifieds, and/or some canned goods from the case lot sale.

4. “Do I need that?” This kind of goes along with number 3, and can help manage your money and time as you work toward being more prepared.  I’ve been wanting a gravity fed water filter like a Big Berkey filter system.  Clean water is extremely important, but the filter is kind of pricey.  It hasn’t made the “Buy Me” cut yet because I have a few smaller water filters (water bottle filters, hiking size pump filter, and LifeStraw), lots of water stored in jugs, and methods to purify water from iodine type tablets to heating water on a stove/fire or in my Sun Oven.  Same with training opportunities.  If you are CPR certified and a CPR class comes available, you could take it again, but do you need to?  Could you use that time to learn something in an area you don’t already have skills in?

Keep an open mind with your prioritizing.  If a pressure canner is on your list after 5 other big ticket items and an opportunity presents itself to buy one at a yard sale for cheap, by all means take that baby home with you!  But in general, asking these few questions will help you figure out where on your list of preparedness goals to begin and hopefully you’ll stay out of the panic shut-down and be on your way to becoming better prepared for whatever may come.

5 Reasons to Update and Rotate your Emergency Kits


Apr 102012

 
Once you get an emergency kit put together either for your home, office, car, or bugging out, there is a tendency to stash that kit somewhere and forget about it.  Don’t do it.  Be friends with your kit.  Check in on it at least once a year–every 6 months is even better.  And some kits need updating even more often than that.  Need some convincing to do a kit checkup?  Here are 5 great reasons to keep updating your emergency kits.

1. You use stuff out of it.  Well, maybe it wasn’t you, maybe it was your significant other or your kids or the ubiquitous “nobody”.  The point is, sometimes when you most need a roll of toilet paper from the car kit it isn’t there!  If you keep a list of items that are supposed to be in the kit tucked in the kit somewhere, it’s easy to check if everything is there.  If you know you’re using items frequently, you will probably need to refill your kit more often than every 6 months.

2. Food and water expire.  Some of the foods in your kit will have an expiration date.  If you’re checking in on your kit often, you can eat these foods and replace them with fresh items.  Same with water bottles.  They aren’t made to last forever–the water gets an “off” taste and it is reported that some of the plastic chemicals leach into the water after long periods of storage.  Use them and replace them before they are too long past their expiration date.  If you have really old water bottles, use that water to water your plants or something.

3. Medications expire.  If you have medications in your kit, these also need rotated.  At best they begin to lose potency after their expiration date.  I want medicines that are going to work and work well when I need them, so I try to keep the medicines updated with fresh stuff from the medicine cabinet.  Check this post to see how I keep track of the lots and expiration dates of the medications in my kit.

4. People grow.  Especially kids.  If you have extra clothes or shoes in your kits for your family members, how likely are they to actually fit them in an emergency?  With some kids (especially babies and young teens) this will need changed out every 6 months or so while they’re going through growth spurts.

5. You learn something new.  Maybe you’ve been reading a book or a blog and come across something you really think would be of value to your family in an emergency.  Get it into your kit and add it to your kit master list.

Some folks like to pack their kits and leave them (our evacuation kits are like this), and some use items from their kits for everyday emergencies (our car kits are more like this).  Either way, your kit will need updated and rotated frequently to best serve its purpose when there is a reason to use it.

The Great Powdered Milk Taste Test and Review

Does anyone out there think powdered milk tastes good?  Yeah, it's fine for cooking, but if there is an emergency situation, we may actually end up having to drink it.  If you're interested in finding out which powdered milk tastes the best, click on the link below and read about this lady's experiment.  Apparently, the cannery milk is the cheapest, but it's also the most disgusting.  : )

Click here for her article

Dry Milk Conversion Chart

See More About:
Keeping dry milk powder in your pantry ensures that you'll always have milk on hand for baking. When is comes to baking breads, dry milk powder can be used in place of the milk called for in the recipe.
Milk to dry milk conversion:
  • 1/2 cup milk = 2 Tbsp dry milk and 1/2 cup water
  • 2/3 cup milk = 2 Tbsp dry milk and 2/3 cup water
  • 3/4 cup milk = 3 Tbsp dry milk and 3/4 cup water
  • 1 cup milk = 1/4 cup dry milk and 1 cup water
  • 1-1/4 cups milk = 1/3 cup dry milk and 1-1/4 cups water
  • 1-1/3 cups milk = 1/3 cup plus 1 Tbsp dry milk and 1-1/3 cups water
  • 1-1/2 cups milk = 1/2 cup dry milk and 1-1/2 cups water

Financial Preparedness - the Importance of a Monthly Budget

http://americanpreppersnetwork.com/2012/06/financial-preparedness-the-importance-of-a-monthly-budget.html

By Stephanie Dayle - Tue Jun 12, 5:58 am

Financial Preparedness means, you are as ready, financially, as you are well supplied for any disaster that may head your way.  All the supplies in the world won’t help you if you are lambasted by your bank or the IRS and evicted from your home because you couldn’t make ends meet and pay your bills.  Out of all the things we prep for, the least likely of them to happen, always seems to be the ones I hear about people preparing for.  Those black swan (or SHTF) events are a real possibility and worthy of preparedness, but in the scheme of things they are not likely.
The chances of a second Great Depression are far greater than the much talked about single day economic collapse.  A prolonged depression may in fact lead to a collapse eventually, but it could last a long time.  When we “prepare”, its not just of those really bad single day disasters, it’s for ANY emergency, including a job loss or economic depression.

If the above scenario were to take place; you would STILL have to pay your bills.  If you don’t, I can almost guarantee you – there will STILL be plenty of people around to haul your butt into court and either repo your property or put a lien on your house.  If your creditor or bank goes under, someone else will buy or assume the debt, maybe even the government.  Some of the last good paying jobs around will be that of debt collectors and repo men.

The only way you can prevent this from happening, in good times or bad, is to pay off your loans and adopt a debt free lifestyle.  An economic disaster is NOT your ticket out of paying your bills.  Getting out of debt takes hard work and discipline, but the pay off in financial freedom and ultimate preparedness is great.
As you start working towards your debt free lifestyle, your first step can be setting up a monthly budget as described in my previous article here.  Setting up a monthly budget is important because it is taking control of your money.  “It’s making your money behave” as Dave Ramsey likes to say.  A monthly budget is you telling your money what to do, rather than you sitting back at the end of the month wondering where the heck it all went.  It’s a plan, and success always comes quicker with a plan.  People hear the word “Budget” and they think “no fun” and “I can’t buy my preps”, but it doesn’t have to be like that.  There are tons of ways to prep while on a budget, and when you do get out from under that debt think of how relieved you will be, think of how free you will be!
Remember, there is no point in doing this if you don’t stick to it.  Your monthly budget should be done at the end of each month, prior to the next one starting.  Make a rule that if you don’t write it down, you don’t spend money on it.  This is the ONLY way to prevent that ‘lost’ feeling one gets when you sit down to pay bills and wonder where all of your money went.  People who budget know EXACTLY where their money goes and what it is doing.
More Monthly Budget Details – Prioritizing:
  • When you are setting up your budget, pay your DEBTS first before other stuff, starting with your mortgage.  Your mortgage should always have top priority over other bills like cable or internet.
  • If you owe any taxes these should also take top priority – the IRS is the most powerful debt collection agency in the world and they answer to no one.  Make sure you take care of your taxes.
  • Your next priorities should be things like power and water, then you can move on to vehicle loans, then credit cards.  What you are doing, in a sense, is giving priority to things that will keep you alive and safe and allowing you to get to work before you are addressing things that keep you comfortable and entertained.
  • Once money is allotted for your bills, then designate an amount for food in the form of groceries.
  • Next, before you start paying extra on any bills, set up a “saving account” somewhere for an emergency fund.  And devote as much as you can to it, even if its only $10 a month.  Start with a goal of one month’s income (whatever your household makes in one month) and work your way up to six months.
  • After your bills are paid, your home is stocked with food for the month, and you’ve sent a little money to a savings account, then move one to extra activities for kids (YES, your bills and savings take priority over your kids’ entertainment and enrichment), cable, internet, and lastly “eating out / shopping” if you have the funds to do so.
Preppers will often scrap those last three categories and opt to use that money to prep.  Most seasoned preppers have learned important lessons like prioritizing, sacrifice, and responsibility.  We have learned that our family’s safety and security is more important than going out for some sushi on a Friday night or that football package on TV.  It doesn’t mean that we don’t have any fun at all – it just means we’ve focused our efforts and resources into what is important for us.

10 Rookie Food Storage Mistakes

10 Rookie Food Storage Mistakes
Original Post Found Here from the American Preppers Network

Are you new to food storage?  Each experienced prepper began just as you.  Take advantage of their mistakes by learning the 10 Rookie Food Storage Mistakes that should be avoided:
  1. Having buckets full of grains, beans or wheat, but have never cooked them before.  Make sure to practice cooking with your food storage.  Also note that if storing wheat berries you will need to have a wheat grinder to make flour.
  2. Storing food that your family does not eat.  In a stressful emergency time, it will be such a comfort to serve familiar foods. Make a list of favorite foods then begin storing them.
  3. Not rotating food storage.  Even though some foods can go past their expiration dates, you should try to use your oldest food storage first.  A system of putting newer food toward the back of the shelf and rotating the oldest to the front of the shelf will help prevent food waste.
  4. Minimal variety of food for a balanced diet.  To prevent food burnout it is best to store a wide variety.  Try storing many varieties of fruits, vegetables, grains, beans, meats, seasonings and staples.  Also keep on hand foods that are freeze dried, canned, dehydrated, MRE’s, and prepared as instant packaged meals.
  5. Poor choice of storage containers.  Prevention of pests and rodents invading your food storage is key.  Using the right food storage containers also prolongs shelf life, nutritional value and taste. Food grade plastic containers, Mylar bags, glass canning jars, #10 cans and even buckets all help to maintain a longer shelf life. 
  6. Never put all your eggs in one basket. Store dehydrated and/or freeze dried foods as well as home canned and “store bought” canned goods.  These varieties will help to balance out your cooking options and even add a variety of textures and flavors.  Another take on this point, is to not store all of your food storage in one location.  Instead of having all of your food storage in one location, it may be wise to have other hiding locations.  False walls, under floor boards, another building on your property, at your emergency bug out location or even a storage facility.
  7. Forgetting salt, cooking oil, shortening, baking powder, soda, yeast, and powdered eggs. You can’t cook even the most basic recipes without these items.
  8.  Not storing water to cook the food.  Many food storage meals require water to rehydrate.  Pasta, beans and soups all need water for cooking.
  9. Forgetting to store spices, salt, oil and basic condiments that are needed for your food storage. How will your famous spaghetti sauce taste without Italian seasoning, salt, olive oil and that pinch of sugar? Beans are a great staple to have on hand and can be seasoned in a variety of ways using salt, cumin, garlic powder, onion powder, soy sauce, ground red pepper and more. 
  10. Not having an alternative cooking source if the power goes out.   There are many alternative cooking sources such as the Kelly Kettle, Volcano Oven, Wonder Oven, Propane Camp Stove, Solar Oven and much more.  Research now to see which option is best for your family.
One last tip, don’t forget to store easy to prepare foods to help you get through on difficult days.  Even though they may not be on your list of required food storage foods, you may want to reconsider puddings, juice boxes, instant packaged foods, coffee, candy, muffin mixes, cake mixes, Hershey’s chocolate syrup (lasts a long time without refrigeration), brownie mix and other specialty comfort foods.
In this day and age, with the increase in gas and food prices, it pays to learn from seasoned prepper’s  mistakes.  Another words, learn from their past mistakes!

Where do I put all this food?

One of my biggest issues with food storage is where to put it all!  I really like this post from foodstoragemadeeasy.net because they had some great ideas about how to make storage solutions in small spaces.

Lisa

Friday, January 18, 2013

Pre-disaster financial preparedness checklist

Pre-disaster financial preparedness checklist

Take these 8 steps now to avoid financial disaster later

By , (information copied from here -Lisa)

If disaster strikes your family, you don't want to be left without access to money or credit cards. Experts say to take these steps before hurricanes, wildfires, earthquakes, tornadoes or other natural disasters hit:


1.  Keep some cash handy.
Have some emergency cash or travelers checks set aside in a safe, secure place. How much you need depends on your family's circumstances, but a few hundred dollars may be a good start. It should be easily accessible. Remember that banks and ATMs may be inaccessible if there are power outages, curfews or mandatory evacuations. Be careful with that cash, and put it back in the bank once the danger passes, because if it's lost or stolen, your homeowners insurance policy will cover only a limited amount. 

2.  List account numbers, institution phone numbers.
Keep a log of account numbers and toll-free telephone numbers for all of your banks, credit unions and lending institutions for credit cards and mortgage and car loans. You can make photocopies of the front and back of the cards or type up a list and e-mail it to yourself. This information should be kept in a secure but accessible place. The Federal Trade Commission has more tips to help keep financial documents up to date and portable for emergencies.

3.  Flood-proof important papers.
Place photocopies of important documents in a plastic bag and double wrap them to protect against water damage. Consider putting them in a safe deposit box.

4.  Use cellphone and email as backup record-keepers.
Save the toll-free telephone numbers to your credit card issuers in your cellphone contact list or email the list to yourself in an encrypted, password-protected file. If cards are lost or stolen, you will be able to quickly alert credit card companies. But beware: Cellphones and Internet access may be limited or completely shut down following a disaster -- as may your ability to recharge your phone. Don't make them your only recourse for retrieving your information.

5.  Create a fire-safe records box.
Place important financial documents in a fire-safe box, but keep in mind that if mandatory evacuations are ordered and your neighborhood is inaccessible for any reason, you may not be able to get to the box.

6.  Spread the wealth.
Don't give all of the credit cards and checkbooks to one family member. If you are separated for any reason, the other person may be stranded.

7.  Set aside emergency-only credit card.
Designate one credit card for emergency use only. It should have enough available credit to accommodate purchases of food and supplies for a week or more. Making purchases on a credit card will help you document disaster-related expenses, which may be reimbursed by your insurance company or other assistance program. If you don't use this card very often, you may want to call the credit card issuer and let them know you will be using the card. Making several large purchases on a card that has been inactive or suddenly making transactions in a location away from your home may trigger a fraud alert and a freeze on the account.

8.  Inform card issuers in advance, if possible.
Call the credit card issuers and alert them that you may be inaccessible and give them alternative numbers where you can be reached. Ask about your available credit limit and if you can increase it during the crisis, have late fees and finance charges waived temporarily or work out alternative payment plans.

Financial Training with our Kids

Money can be a stressful topic, especially in a tough economy, so all the more reason to start now to teach our kids to be financially responsible!  There is a lot of good information about teaching our kids about money from themint.org.  Everyone may not agree with everything here, but hopefully we can all learn a little from it.  Here are some things that jumped out at me...  -Lisa

Model Money Smart Habits

It has been said that "Children are great imitators. So give them something great to imitate."
As parents, we know our children observe our every action, including gaffes that we hope will go unnoticed.  We have those hopes because we know that our actions speak loudly.
In fact, a March 2010 Themint.org poll showed that parents have the biggest influence on the way kids save and spend money, moreso than friends, celebrities or their teachers.  Believe it or not, parents shape the way children manage money more than anyone or anything. They actively absorb the way that moms and dads pinch pennies or make mistakes with money.

Questions to Consider

Modeling money smarts takes a serious parental commitment.  Parents should consider the behaviors that they’re modeling to their kids by asking themselves: 
  • Do my kids see me economize?
  • Do they see me shop more often at outlet malls or high-class boutiques?
  • Do I suggest that shopping is entertainment?
  • Do I wait for an item to go on sale?
  • Do I regularly clip and use coupons?
  • Do I send in rebate offers?
  • Have my children ever seen me save up for large purchases or do I whip out the plastic when you see something I want?
  • When I make large purchases, do I research brands and features?
  • Do I comparison shop with my kids to underscore the seriousness of the purchase?

Teach Them Well

Modeling money smart behavior doesn’t have to be complicated; there are many simple things parents can do.
  • Involve kids in everyday conversations about money.  Use real-life situations to help them learn lessons.
  • Use the grocery store as a classroom.  Talk through purchases with young shoppers and help them weigh all factors that go into a purchase decision.
  • Extend the grocery store lesson to the shopping mall.  Reinforce smart spending, not immediate gratification. Wait for discounts, save for items and pay with cash instead of plastic.
  • Emphasize planning.  Make a list before you enter a store to teach children to focus on needs.
Modeling money smart habits to children – aligning your actions with your words – brings the lesson home.  Start early, and you’ll lay the groundwork for financial security later on. 


dollar blocksTwo ways to help your kids understand money

As savvy as kids are in this Information Age, they remain dangerously uninformed about money. Yet knowing how to manage money is a skill that will help determine the quality of your child's adult life. Just as kids learn to read and write, young people must become financially "literate." Few schools teach money management. As a parent, the all-important task lies with you.
As parents, we must move in two directions.
  1. Every day, we need to create conversations about money – not lectures, but casual commentaries on situations that arise naturally in our days. The aim? To teach children a) how to think about money and b) make responsible decisions in using it.
  2. We must review our own financial habits so that we are modeling responsible financial behavior. Children quietly observe adults, and parents are "modeling" financial behavior all the time – whether or not we mean to.
Everyday Opportunities
Our days are full of opportunities to talk about money with our kids.  Sometimes we don’t recognize situations as opportunities. Sometimes, we may see an opportunity, but we’re too rushed to take the time to talk about it – so we let these valuable real-life lessons slide. Other times, we think that it’s not “right” to talk to kids about our money decisions.
Question:  If we don’t take the time to use real-life situations, how will kids learn the money lessons they need as adults?  Our days provide many money lessons. How good are you at recognizing and using these lessons?

Allowances - Trial and Error Money Management
The main reason for allowances is to help kids learn – by trial and error – how to manage money. Because allowances give kids a steady income, receiving regular payments helps kids plan for the future: they can set goals, work to reach them, learn how to save and spend. They also learn to be responsible and to profit from their mistakes.

Responsibility of ownership

Allowances give kids money to keep track of – in other words, not lose or misplace it. If money "disappears," it's gone. Kids will eventually learn to be more careful with money.

Responsibility of making their own spending decisions

When kids must spend their own money on items you consider foolish or extravagant, you are no longer put in the position of approving or denying the purchase. It's their money. They may or may not learn that the item was not as great as it promised, or that is was flimsy, or that its excitement only lasted a day. If they learn any of those lessons, the item becomes well worth whatever amount of money your child paid for it.

Good practice

Kids are bound to make mistakes in the way they handle their allowance, but that is all part of the learning experience. Making mistakes early in life on small things should prevent more serious mistakes later on, when errors can have more long-lasting consequences.
While most experts agree that allowances are good money-management tools, opinions differ about structuring allowances. Families must decide for themselves how to iron out the details. Read more on how to structure allowances.

Allowances - the Issues
When to begin? How much to give? Do you supplement allowances with spending money? When do allowances stop? Here are some thoughts on each of these issues. Use them to discuss how to handle allowances in your family. Every family is different and has to decide for themselves what to do.

When to begin

Some parents begin before ages 6 or 7, as soon as children can recognize the different values of coins. What can a pre-schooler need? Not much. The idea here is to learn balance: spend some money, save some, and give some to charity. Some parents want to start these habits as early as possible. Others parents wait until grade school – these parents feel that grade schoolers have a better understanding of money and how it can be used. Let your child's grasp of the concepts be your guide.

How much

Some experts say dollars should match the child's age: $7 for a 7-year-old. Other experts recommend one dollar for every year of school. Such a pat formula is not always realistic. The amount you give your child depends on three factors:
  • The economic climate of your neighborhood. What are other children getting? Different neighborhoods represent difference cost-of-living levels.
  • What the allowance covers. In the early years, the allowance may be used for incidentals. Later on, it will cover more. The financial responsibilities of your child should grow with age. If your teen has to fund clothing purchases, gas, and auto insurance, as well as entertainment and daily miscellaneous purchases, then you have to give an allowance large enough to cover these needs. Being financially responsible usually makes kids respect the items they buy and teaches decision-making. They will learn very soon that money is limited.
  • Other considerations. If you do not give enough money for teens to learn to save some for long-and short-term purchases, spend some money during the month, and perhaps donate some to charity, you are not providing a learning experience. If the allowance isn't generous enough, teens might spend it all because they haven't got enough money to divide among several categories.

How often

When children are younger, they should be paid every week. Young children more easily handle time in smaller chunks.
However, you might consider shifting to a monthly payment for teens. Being paid once a month more closely approximates the real world, where paychecks and bills come monthly. Plus, increasing the time between payments also increases teen responsibility to stretch those dollars. If your teen has buzzed through his or her spending money by the 10th, waiting for the 1st of the month can be a long time.

How long

Some experts say that when your teen starts to earn money at a part-time job, you can begin to reduce the amount of the allowance. The money burden is beginning to shift from inside the family to outside the family. If teens find they're running short of money, then they have choices: 1) review money management practices, with an eye toward spending 2) adjust their lifestyle, or 3) work more hours. However, working more hours during the school year detracts from studying. A better idea is to work longer hours during the summer and cut spending.

"Spending" money

Do you supplement allowances with spending money? Spending money is the money you give your kids to spend on a specific thing or event. It's Sunday and a bunch of kids are going to a matinee. You shell out $15 for the ticket and popcorn. If you supply spending money, then perhaps allowances should not be so generous. After all, you're taking care of entertainment expenses as they arise.

Allowances tied to chores

This is a major controversy. Examine both sides and then make up your own mind.
Pro-chore advocates. On the one hand, some experts say that kids have to learn the connection between money and earning it. To tie allowances to chores does that. The message to kids is that you earn the allowance – you are not simply entitled to it. The real world expects work in exchange for money.
The anti-chore advocates. What happens when kids don't do the chores? If you dock their pay, you're depriving kids of their money management lesson, which is supposed to be the purpose of allowances. Another problem: where does paying for chores end? Do you pay kids for everything they do around the house? Does paying for chores teach kids to expect pay every time they contribute to the good of the family? That's not realistic. Who pays a parent for doing the laundry and shopping? Kids must help with the running of the household. Bigger chores – washing windows – deserve pay.

Pay on time

It's a way to teach your child that commitments have to be kept and that people depend on one another.

Don't cave

Here's the scene. Your teen asks you for an advance. He's worked his way through his spending budget, and this great opportunity has come along. If you cave in, he misses the lesson of keeping money in reserve for unanticipated expenses. Bail him out often enough, and you undercut the lesson he's created for himself.
Look at the issues, and talk them over with your partner. See what fits your philosophy and works best for you. Do you intervene in how your teens handle their allowance? For answers, go to Whose Allowance Is This Anyway?

Fire Safety

The following information was taken from the Albuquerque Fire Department's website.  I found it to be very useful and important information for our families.  -Lisa


In the event of a fire, a smoke alarm can save your life and those of your loved ones. They are a very important means of preventing house and apartment fire fatalities by providing an early warning signal -- so you and your family can escape. Smoke alarms are one of the best safety devices you can buy and install to protect yourself, your family, and your home.
  • Place properly installed and maintained smoke alarms both inside and outside of sleeping areas and on every level of your home. Interconnected smoke alarms are best because if one sounds, they all sound. Get smoke alarms that can sound fast. Test smoke alarms monthly and change alkaline batteries at least once every year, or as instructed. You can use a date you already know, like your birthday or when you change your clocks as a reminder.
  • Consider buying a long-life (lithium) battery-powered smoke alarm, which may last up to ten years with no battery change.
  • Install smoke alarms away from air vents.
  • Install smoke alarms on the ceiling or wall, at least 4 inches from corners or according to manufacturer’s instructions.
If a smoke alarm sounds during normal cooking or when bathing, press the hush button if the smoke alarm has one. Open the door or window or fan the area with a towel to get the air moving. Do not disable the smoke alarm or take out the batteries. If this happens often, the smoke alarm will need to be relocated.

Residential Fire Sprinklers

  • If possible, install residential fire sprinklers in your home.
  • Avoid painting or covering the fire sprinkler, because that will affect thesensitivity to heat.
  • Do not hang decorations, plants, or other objects from the sprinkler or pipes.
  • For more information on Residential Fire Sprinklers, please obtain the Install. Inspect. Protect. Campaign’s “Residential Fire Sprinkler Fact Sheet.”

Escape Planning

Prepare and practice an escape route with all residents in the home, including children.
Know two ways to exit from every room in your home. Make sure safety bars on windows can be opened from inside your home.
  • Crawl low, under smoke.
  • Feel closed doors. If hot, use another exit. Identify a place to meet household members outside.
  • Call 9-1-1 or the local emergency number after you escape.
  • Never go back inside a burning home.

Fire Safety Walk through

  • Keep clothes, blankets, curtains, towels and other items that can be easily set on fire at least three feet from space heaters, and away from stove burners.
  • Place space heaters where they will not tip over easily.
  • Have chimneys cleaned and inspected annually by a professional.
  • Clear away trash, flammables and decorative materials.
  • Always use a metal mesh screen with fireplaces and leave glass doors open while burning a fire.
  • Never leave cooking unattended.
  • Be sure your stove and small appliances are off before going to bed.
  • Check for worn wires and do not run cords under rugs or furniture.
  • Never overload electrical sockets.
  • Keep lighters and matches out of the reach of children.
  • Never leave cigarettes unattended and never smoke in bed.
  • Make sure cigarettes and ashes are out. The cigarette needs to be completely stubbed out in the ashtray or run under water.

Thursday, January 17, 2013

Recipe with Food Storage Ingredients

This recipe was taken from an AMAZING website, full of tons of food storage recipes.  Click here to see more.  I can't wait to try some of these, and plan to make some sort of recipe book to keep with our food storage in case we ever REALLY need it!

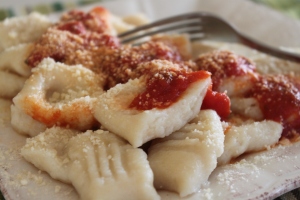
Gnocchi


Print the recipe card!  gnocchi
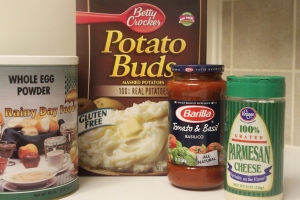
Gnocchi, or German potato dumplings, are about the easiest and fastest dish to make.  There’s nothing to it!  We like ours topped with warm spaghetti sauce and sprinkled with parmesan cheese.
serves 4-6

Ingredients:

2 cups dry potato flakes
2 cups boiling water
2 eggs -or- 4 TBS water mixed with 2 TBS egg powder
2 tsp. salt
¼ tsp. pepper
1 ½ cups flour
1 jar marinara sauce
2/3 cup grated parmesan cheese
****
Instructions:
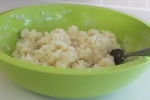
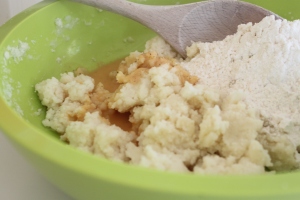
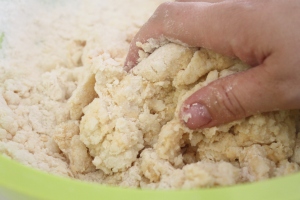
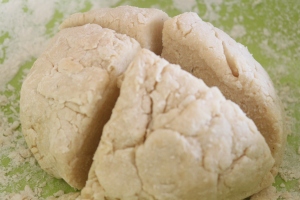
Pour boiling water over potato flakes and mix.  Let cool.  Begin heating a pot of water to boil.  Sift egg powder (if using) and add to water, mixing well.  Add salt and pepper to egg mixture.  Add egg mixture and flour to potatoes, mixing with hands into a firm dough.  Knead lightly and form into a ball.  Divide into fourths.
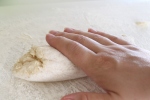
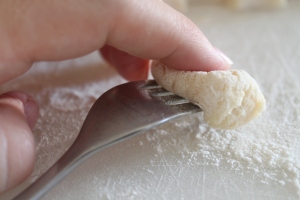
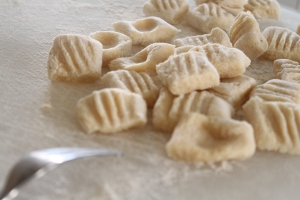
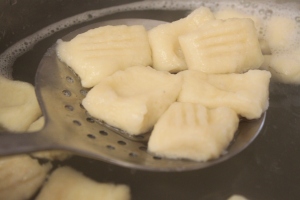
Working one portion at a time, roll the dough out on a floured board into a long roll about an inch in diameter.  Cut into bite sized pieces.  Against the tines of a fork, use your index finger to indent each dumpling.  Add the dumplings (each quarter portion at a time) to the boiling water and cook until gnocchi float to the top.  Remove using a slotted spoon and serve topped with sauce and parmesan cheese.
****
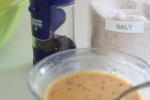
Make the dough


Form the bite sized dumplings…


Boil until they float to the top.

Serve and enjoy!

7 Simply Steps to Disaster Prep and Emergency Preparedness

This is an awesome blog post I found via Pinterest.  Check out these 7 steps here

Monday, January 14, 2013

What is in a 72 hour kit?

There are lots of Internet sites that give you lists of things to have in your kit. Here are a few of them:

http://www.ready.gov/basic-disaster-supplies-kit

http://www.fema.gov/pdf/library/fdsk.pdf

http://www.nfpa.org/assets/files/PDF/Research/GR/hand/e/Supplies_Kit_Checklist.pdf

Home Water Storage

Emergencies: Home Water Storage and Emergency Disinfection Before an Emergency


Amount of Water to Store

The Department of Environmental Quality, Division of Drinking Water recommends water storage of 1 gallon per person per day for 2 weeks. This is based on 2 quarts or ½ gallon per person per day for drinking water and food pre parathion, and another 2 quarts or ½ gallon per person per day for other limited uses such as hand washing, teeth brushing and dishwashing. (This is a total of 14 gallons per person for 2 weeks.)
A normally active person needs to drink at least 2 quarts (1/2 gallon) of water each day. Hot environments and intense physical activity can double that amount. Children, nursing mothers and people suffering from disease or injury may need more water. Immune compromised people may want to take extra precautions to minimize their risk in an emergency.

Supplies Needed Before an Emergency

  • Food grade containers for storage of water
  • Funnel
  • Filters: coffee filters, clean cheesecloth, teal towel, or pillowcases
  • Eyedropper
  • Unscented chlorine bleach (5.25% sodium hypochlorite)
  • Large clean pan with lid for boiling water
  • If storing water in a 55 gallon drum, a pump is needed
  • Purification device, back packer filters
  • Camping stove to boil water

Storage Containers

Water should be stored in containers manufactured for food use.
  • A 5 gallon heavy duty plastic container with spigot to dispense water (weighs approximately 42 pounds when full).
  • A 6 gallon Mylar water storage bag, impermeable to odor, gas and light, contained in a cardboard box for easy stacking. Durable (weights about 50 pounds).
  • A 2 liter plastic drink container with screw on lid.
  • A 55 gallon drum that has not stored toxic materials (weighs 460 pounds when full).
  • A thermos type container.
  • A 1 gallon size glass jug (padded with newspaper).
  • Water “canned” in regular canning jars and processed for 20 minutes (repack in cardboard box and pad with newspapers).

Never use any containers that have held toxic substances.

Plastic bleach bottles and gallon milk containers are generally manufactured with non-durable plastic that promotes biodegradability and is undesirable for long term water storage. Water stored in non-durable plastic containers may become toxic over time from breakdown products from the plastic container walls.
The disposable, plastic milk bottle is thin-walled and tends to develop leaks easily. Liquid chlorine bleach bottles are made of thicker polyethylene plastic and may be used for water storage if the empty bottles are thoroughly rinsed with hot water and allowed to dry. However, the use of bleach bottles for water storage is not recommended, because of the potential danger of accidentally drinking bleach instead of water. If bleach bottles are used for water storage, remove the bleach label and write “WATER” indelibly across the bottle. Children may mistakenly associate the size and color of bleach bottles with acceptable sources for drinking water and mistakenly drink bleach. As such, bottles must be positively identified, and bleach must be kept out of the reach of children.
If plastic containers are used, care should be taken to assure that they are made of plastic approved for food contact by the Federal Food and Drug Administration (FDA). Polyethylene plastic is approved for food contact and is commonly used for containers of various sizes, including large 55 gallon drums. Certain types of plastic containers are not intended for food contact (such as vinyl plastic waterbeds or trash containers) and may leach undesirable chemicals into stored water. Leaching from approved plastics into water is negligible.

Preparing Water for Storage

Stored water must be clean water. Use the best quality available for water storage. Water must be from a system with a Division of Drinking Water “Approved” rating. Water stored in thoroughly clean plastic or glass containers can be chemically disinfected for long term treating each gallon with 4 to 5 drops of liquid chlorine bleach (Clorox or Purex type bleaches, containing 4% to 6% sodium hypochlorite). One teaspoon of bleach disinfects 5 gallons of water. Allow 20 to 30 minutes before drinking. The level of treatment will prevent growth of microorganisms during storage. Most municipal water storages are already disinfected so no additional treatment is necessary. Fill clean food grade container with tap water and screw on lids.

Storage Conditions

Store water containers away from cleaning supplies, fertilizers and other products with strong odors. These odors could be absorbed by the storage containers and transferred to the water.
Water stored in plastic containers should be filled to the top so there is no air space and should be stored in a cool, dry location away from petroleum and insecticide products, and away from strong odor food or perfumed products.
Vapors from these substances could permeate the plastic and affect the water. Thick walled polyethylene containers are significantly less permeable to vapors than are thin walled containers.

Use of Stored Water

Once the container is opened, use the water rather than restoring it. If stored water has a flat taste, pour it back and forth between two containers several times. Rotate water every 1 to 2 years.
Store as much water as possible, more than the bare minimum (especially in desert and hot climates). Be certain to label each container so there will be no questions about its contents. Include the date and information on the method of disinfection used.

After an Emergency

Emergency Inside Water Sources

  • Water heaters.
  • Soft water tanks.
  • Melted ice cubes.
  • Toilet tank (not bowl) provided no chemical sanitizers are used.
If a disaster catches you without a stored supply of clean water, you can use the water in your house piping system, your hot water heater and even ice cubes. Know the location of your house’s water shut off valve. In a disaster in which your water company’s supply of water to your house has been interrupted (e.g., broken water mains in the streets), shut off water supply into your house to prevent backflow of contaminated water. To use the water in your piping, let air into the plumbing by turning on the faucet in your house at the highest level. A small amount of water will trickle out. Then, leaving the highest faucet on, obtain water from the lowest faucet in the house.
To use water in your hot water heater, first turn off the electricity or gas supply, and then close off the cold water supply line to the water heater. Open the drain at the bottom of the tank and start the water flowing by turning on a hot water faucet somewhere else in the house. Collect the water containers and disinfect each gallon with 4 – 5 drops of liquid bleach. Allow 20 to 30 minutes before drinking. (Note: If the water is cloudy and/or from an unsafe origin, 16 drops of liquid chlorine bleach is recommended.) You can use water in the tank of your toilet (not the bowl). Disinfect as with water from the water heater.
Some water sources may have chemical contamination that makes them unacceptable for drinking. For example, waterbed mattresses usually contain organic chemicals in the wall plastic and biocidal chemicals in the water to prevent algal, fungal and bacterial growth. These various chemicals can make the water unsafe to drink. During an emergency such water may be used for hand washing and laundering.

Emergency Outside Water Sources

  • Rain water.
  • Ponds and rivers.
  • Untested wells and springs.
Some emergencies may warrant obtaining water from sources outside the home. The hazards of using water, including ice and snow, of unknown quality needs to be carefully weighed against the obvious life sustaining need for drinking water. Even crystal clear, mountain stream water can be contaminated with disease causing parasites such as giardia. Sterilization or disinfection can reduce the microbiological hazard of water of unknown quality, but there is no safe method for reducing the chemical hazard (e.g., toxic chemicals and radioactive materials) of water of unknown quality. If water is cloudy, chemical disinfection must be supplemented by some kind of filtration or heat sterilization (20 to 30 minutes of boiling) to assure complete destruction of disease causing organisms. (Note: If water is cloudy and/or from an unsafe origin, 16 drops of chlorine bleach is recommended.)
In addition to having a bad odor and taste, contaminated water can contain microorganisms that cause diseases such as dysentery, typhoid and hepatitis. You should disinfect all water of uncertain purity before using it for drinking, food preparation or hygiene.
There are many ways to disinfect drinking water. None of the listed methods are perfect. The methods described below will kill most microbes, but they will remove very few chemical contaminants. Before water is disinfected, let any suspended particles settle to the bottom of the container, or strain the water through layers of paper towels, filters such as coffee, clean cheese cloth, or clean cloth into a clean container.
Better clarification can be obtained by drawing cloudy water through a “capillary siphon”.
A capillary siphon can be constructed by rolling a small, clean, terry cloth towel into a long roll. Place one end of the roll into a container of cloudy water. Drape the rest of the roll over the edge of the container so that it hangs free from the container’s sidewall. Be sure the free hanging (dry) end of the towel extends below the water level by several inches. Place a clean container below the free hanging end. Soon water from the upper container will wet the whole towel as the capillary action draws water through the towel to the lower container. With cloudiness removed, chemical disinfection can be more effective in destroying disease causing organisms.

Methods of Disinfection

Boiling

Boiling is the safest method of disinfecting water. It is preferred over any method of chemical disinfection because most disease causing microorganisms cannot survive the heat of the sterilizing boil. Water must be heated to boiling and held in a vigorous rolling boil for 5 minutes minimum (preferably 10 to 20 minutes). Let the water cool before drinking. Boiled water will taste better if you put oxygen back into it by pouring the water back and forth between two clean containers. This will also improve the taste of stored water.

Chemical Disinfection

Chemical disinfection of water is an acceptable alternative to heat sterilizing, but only if the water is clear. Disease causing organisms, such as viruses, can “hide” inside the microscopic dirt particles that cause cloudiness in water. They can thereby escape the action of the disinfecting chemical and remain capable of producing disease.
Chemical disinfection is less reliable than disinfection via boiling because of several different factors. For example, the more organic matter there is in the water, the more chemicals are required. The colder the water is, the longer the “contact time” (the length of time between addition of disinfecting chemicals to the water and use of the water) should be. Additional factors affecting the success of disinfection includes the amount and type of chemicals used, water pH (how acidic or basic the water is), and types of disease causing organisms in the water.

Liquid Bleach

You can use household liquid bleach to kill microorganisms. Use only regular household liquid bleach that contains 5.25% sodium hypochlorite. Do not use scented bleaches, color safe bleaches or bleaches with added cleaners. Each gallon of water should be treated with 4 – 5 drops of liquid chlorine bleach or 16 drops of liquid chlorine bleach if the water is cloudy. This is just under ¼ of a teaspoon per gallon. One teaspoon of bleach disinfects 5 gallons of water. Treated water should be thoroughly mixed and allowed to stand for 30 minutes before using. A slight chlorine odor should be detectable in the water. If it is not, repeat the dosage and let it stand another 15 minutes before using. Treated water may have a slight chlorine taste, but this is additional evidence of safety.
Since liquid chlorine bleach loses strength over time, only fresh bleach should be used for water disinfection. For bleach that is 1 to 2 years old, the dosage should be doubled. Bleach older than two years should not be used unless absolutely necessary because of uncertainty as to how much the active ingredients have deteriorated.

Iodine Tables

Iodine tablets have the advantage of being more effective against amoebic dysentery cysts and certain other intestinal parasite cysts than chlorine-based disinfectants such as sodium hypochlorite or Halazone tablets. Sporting good stores commonly carry iodine tables. Be certain iodine tablets are fresh, since they lose effectiveness with age. Fresh tablets have a gray color. They have a shelf life of approximately 3–5 years unopened. The label should show an EPA registration number. Often iodine tablet containers carry labels recommending restrictions on use by pregnant or lactating women. Check the label before purchasing the tablets. Follow instructions on the label, mixing thoroughly and allowing adequate “contact time”. The iodine tablet should impart a light yellow to tan color to the water and a slight odor.

Halazone Tablets

Halazone tablets (4 dichlorosulfamyl benzoic acid) for emergency water disinfection are commonly carried by pharmacies and drug stores. The label should show an EPA registration number. Be certain to note the expiration date since the shelf life is only about 2 years. According to the manufacturer: “It is important that the containers are tightly closed to prevent the absorption of moisture from the air. If decomposition of the tablets should occur, they take on a yellowish appearance, have a strong objectionable odor, and of course, should not be used”.
Chemical disinfection, liquid bleach, iodine tablets, and Halazone tablets will not remove cryptosporidium

Basic Fire Escape Planning

Basic fire escape planning

Practice your planYour ability to get out depends on advance warning from smoke alarms and advance planning.
  • Pull together everyone in your household and make a plan. Walk through your home and inspect all possible exits and escape routes.  Households with children should consider drawing a floor plan of your home, marking two ways out of each room, including windows and doors. Also, mark the location of each smoke alarm. For easy planning, download NFPA's escape planning grid (PDF, 634 KB). This is a great way to get children involved in fire safety in a non-threatening way.
  • Install smoke alarms in every sleeping room, outside each sleeping area and on every level of the home. NFPA 72, National Fire Alarm Code® requires interconnected smoke alarms throughout the home. When one sounds, they all sound.
  • Everyone in the household must understand the escape plan. When you walk through your plan, check to make sure the escape routes are clear and doors and windows can be opened easily.
  • Choose an outside meeting place (i.e. neighbor's house, a light post, mailbox, or stop sign) a safe distance in front of your home where everyone can meet after they've escaped. Make sure to mark the location of the meeting place on your escape plan.
  • Go outside to see if your street number is clearly visible from the road. If not, paint it on the curb or install house numbers to ensure that responding emergency personnel can find your home.
  • Have everyone memorize the emergency phone number of the fire department. That way any member of the household can call from a neighbor's home or a cellular phone once safely outside.
  • If there are infants, older adults, or family members with mobility limitations, make sure that someone is assigned to assist them in the fire drill and in the event of an emergency. Assign a backup person too, in case the designee is not home during the emergency.
  • If windows or doors in your home have security bars, make sure that the bars have emergency release devices inside so that they can be opened immediately in an emergency. Emergency release devices won't compromise your security - but they will increase your chances of safely escaping a home fire.
  • Tell guests or visitors to your home about your family's fire escape plan. When staying overnight at other people's homes, ask about their escape plan. If they don't have a plan in place, offer to help them make one. This is especially important when children are permitted to attend "sleepovers" at friends' homes. See NFPA's "Sleepover fire safety for kids" fact sheet.
  • Be fully prepared for a real fire: when a smoke alarm sounds, get out immediately. Residents of high-rise and apartment buildings may be safer "defending in place."
  • Once you're out, stay out! Under no circumstances should you ever go back into a burning building. If someone is missing, inform the fire department dispatcher when you call. Firefighters have the skills and equipment to perform rescues.
Putting your plan to the test

  • Practice your home fire escape plan twice a year, making the drill as realistic as possible.
  • Make arrangements in your plan for anyone in your home who has a disability.
  • Allow children to master fire escape planning and practice before holding a fire drill at night when they are sleeping. The objective is to practice, not to frighten, so telling children there will be a drill before they go to bed can be as effective as a surprise drill.
  • It's important to determine during the drill whether children and others can readily waken to the sound of the smoke alarm. If they fail to awaken, make sure that someone is assigned to wake them up as part of the drill and in a real emergency situation.
  • If your home has two floors, every family member (including children) must be able to escape from the second floor rooms. Escape ladders can be placed in or near windows to provide an additional escape route. Review the manufacturer's instructions carefully so you'll be able to use a safety ladder in an emergency. Practice setting up the ladder from a first floor window to make sure you can do it correctly and quickly. Children should only practice with a grown-up, and only from a first-story window. Store the ladder near the window, in an easily accessible location. You don't want to have to search for it during a fire.
  • Always choose the escape route that is safest – the one with the least amount of smoke and heat – but be prepared to escape under toxic smoke if necessary. When you do your fire drill, everyone in the family should practice getting low and going under the smoke to your exit.
  • Closing doors on your way out slows the spread of fire, giving you more time to safely escape.
  • In some cases, smoke or fire may prevent you from exiting your home or apartment building. To prepare for an emergency like this, practice "sealing yourself in for safety" as part of your home fire escape plan. Close all doors between you and the fire. Use duct tape or towels to seal the door cracks and cover air vents to keep smoke from coming in. If possible, open your windows at the top and bottom so fresh air can get in. Call the fire department to report your exact location. Wave a flashlight or light-colored cloth at the window to let the fire department know where you are located.
This information was copied from the National Fire Protection Association, here.

Emergency Preparedness - Family Plan

http://foodstoragemadeeasy.net/getting-started/family-plan/  has a great format for a "family plan" to prepare for a possible emergency.  This would make a great family home evening!

Prepare Ahead:

It’s a good idea to be on the same page with your family as to what you would do in case of an emergency. Review these concepts every few months as we all can be forgetful.
□ meet with family members to discuss how to respond to the dangers of fire, severe weather, earthquakes, and other emergencies.
□ find the safe spots in your home for each type of disaster
□ discuss what to do about power outages and injuries
□ draw a floor plan of your home and mark two escape routes from each room
□ post emergency phone numbers near telephones
□ teach children how and when to call 911, police, and fire
□ instruct family members to turn on the radio for information
□ pick one out-of-state and one local friend/family member to call in a disaster
□ teach children the phone numbers
□ pick two reunion locations, one right outside of your home, and one away from your neighborhood in case you cannot return
□ take a basic first aid and CPR class

Contact List:

Here is a list of contact information it would be wise to have figured out ahead of time, and stored in a safe place.
Out-of-State-Contact:
Name:
City:
Telephone:
Local Contact:
Name:
Telephone:
Nearest Relative:
Name:
City:
Telephone:
Family Work Numbers:
Mother:
Father:
Other:
Emergency Telephone Numbers:
Police Department:
Fire Department:
Hospital:
Family Physicians:
Name:
Telephone:
Name:
Telephone:
Reunion Locations:
Right outside home:
Address:
Away from home:
Address:
Telephone:
Route to try first: